 I am fairly excited to finally be writing this post, as it has been much anticipated. Several previous write-ups had completion shots that included photos of the floors, but the improvement and massive amount of labor to accomplish this task was lost on those images. Without further ado, I present to you the process of refinishing hardwood floors!
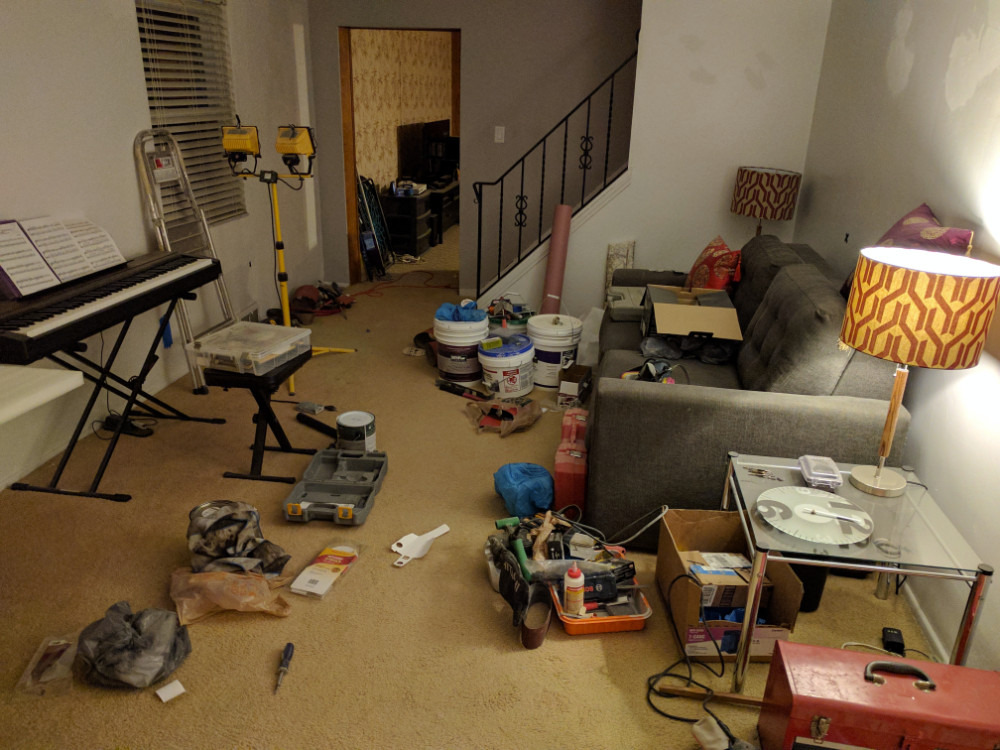
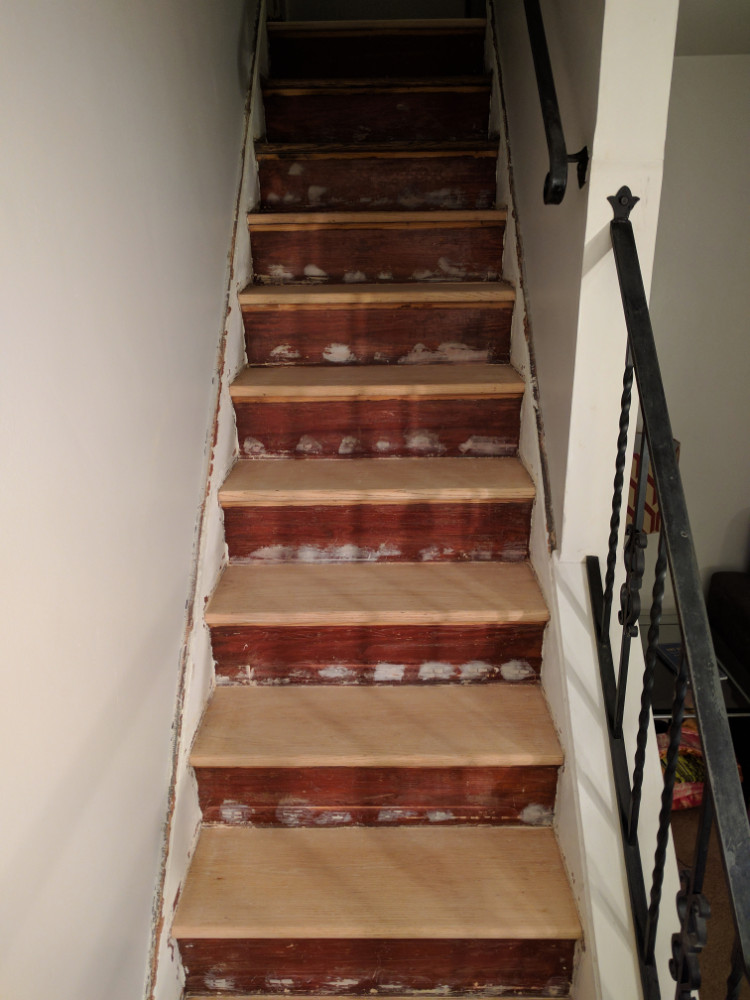
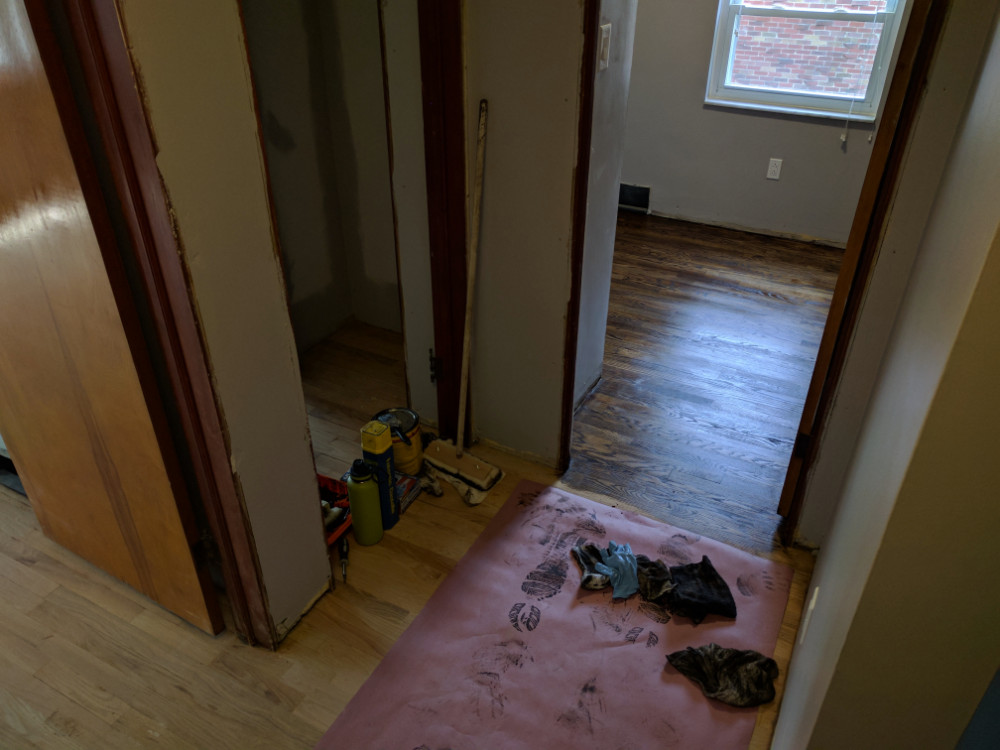
 For the most part, the floors showed signs of wear and tear over the years, but they were in a salvageable state with just simple sanding and finishing. Several spots needed much more TLC, especially after re-running some of the plumbing in the house. To begin this process, we removed the carpet, padding, staples, and nailers. This is a really basic step to complete, so it was not documented well. There are a limited number of photos in the posts for each room – available for the initiated reader.
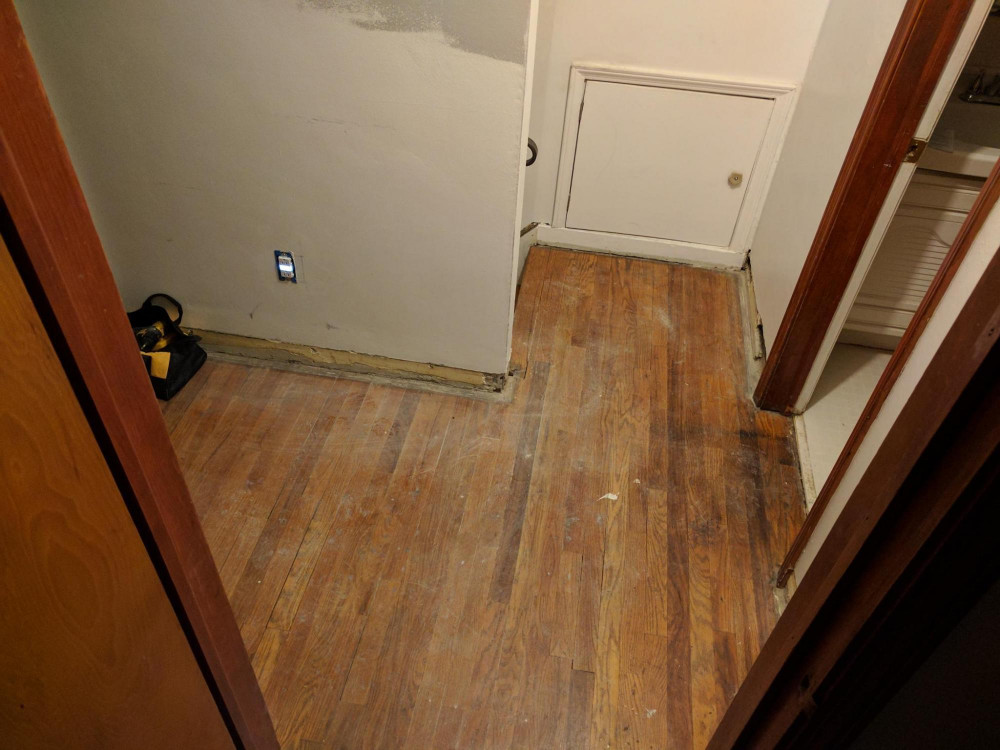
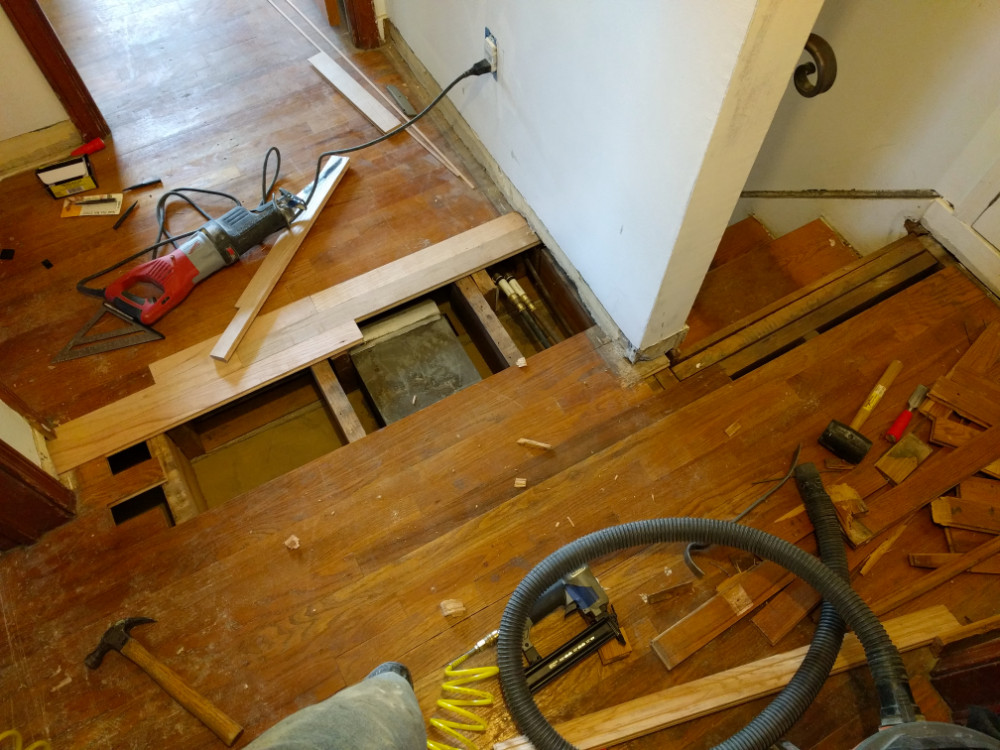
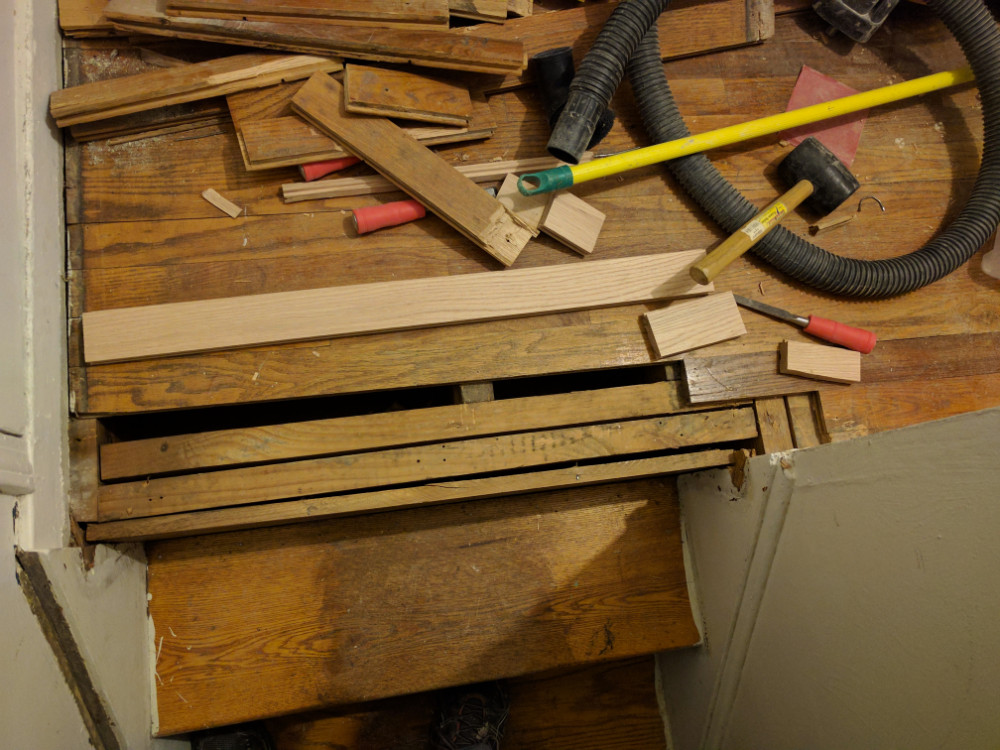
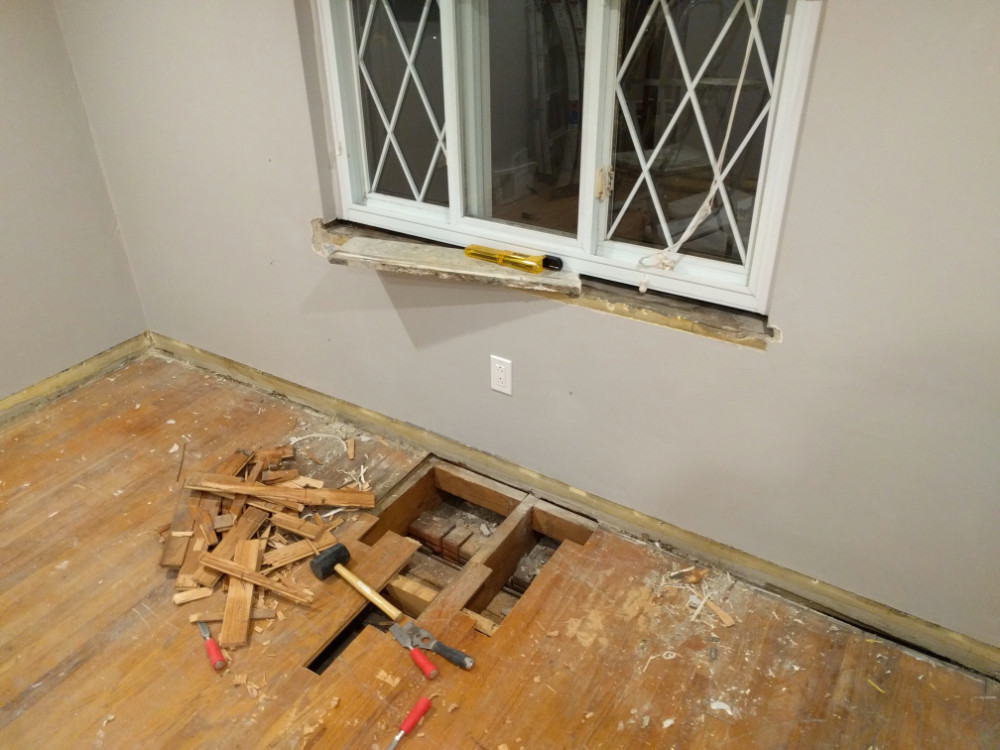
In the photo to the left, (note the hole next to the stair tread) that whole piece of wood was just set in place and could be lifted out. The stair tread itself had split and was falling apart from the underside from years of use following a fastener failure. This was on my list of items to completely remove and replace. In the hall, there was a large section of buckled flooring which also had massive gaps between each board. This was a hanging point with no easy fix, so that will be discussed further below. Finally, the last remaining bad spot could be seen in the second bedroom. From years of water entering through an open window and soaking the carpet, the wood had begun to dry-rot and fall apart. Normally I would have just bleached this section with peroxide and sanded until finding good wood, but that would have taken more than half of the board thickness to do.
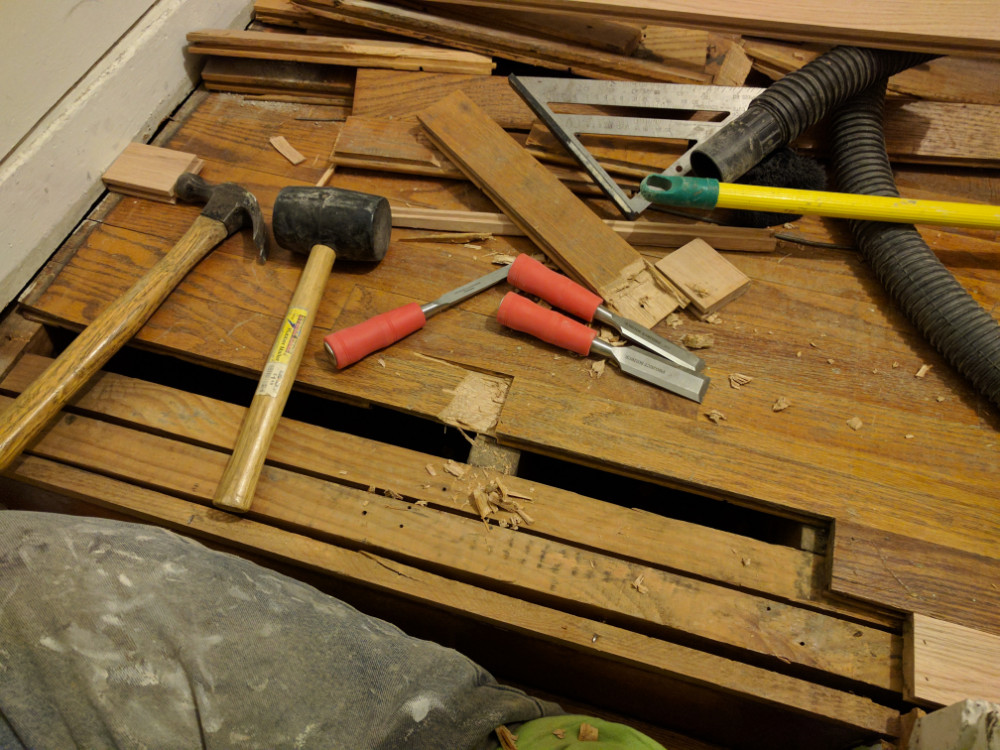
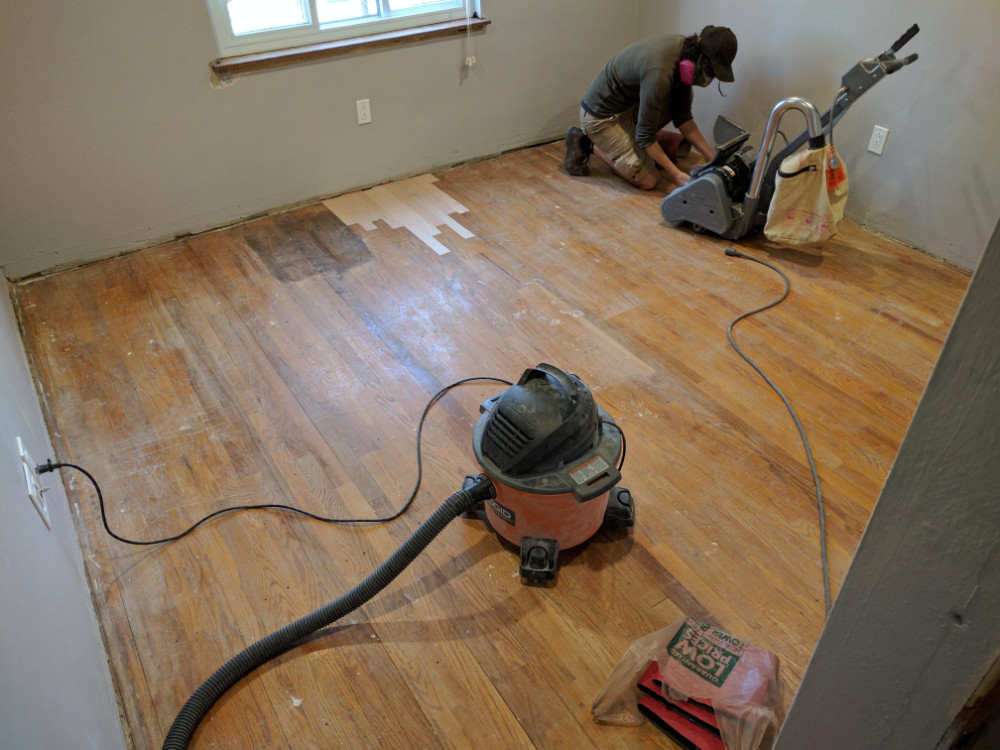
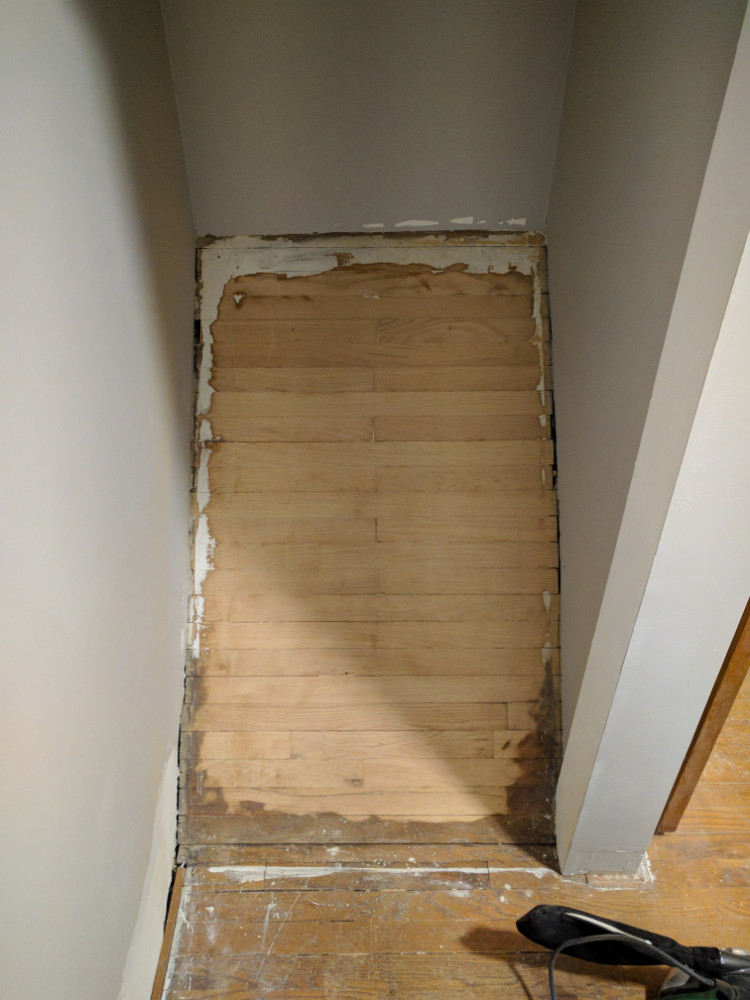
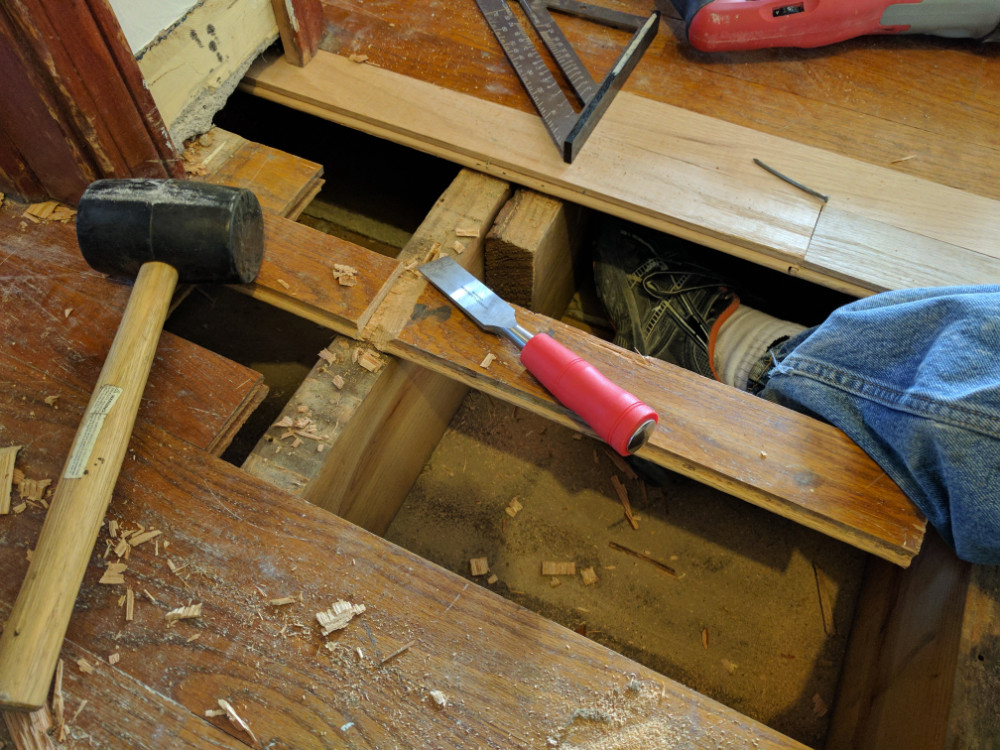 The first step of this project was to replace the bad sections of floor. There are detailed photos of the progression in the gallery below, but the best way of completing this is to use a good chisel. Carefully pop the tongue and top of an adjoining groove off of one board in the middle of the bad section; Carefully work the board out with a screwdriver or pry-bar. Once a hole has been opened, remove boards from either side until enough boards have been removed, trying not to damage any good wood. Any damaged edges will be very visible following refinishing. There was one board in the hall that couldn’t be removed as it was pinned under a wall, so I had to cut it. Seeing that it would be left unsupported due to the lack of a tongue and groove, I decided to cut it directly over a joist. This cut was squared off and completed using a sharp chisel and patience; the joint ended up nearly perfect so it is possible.
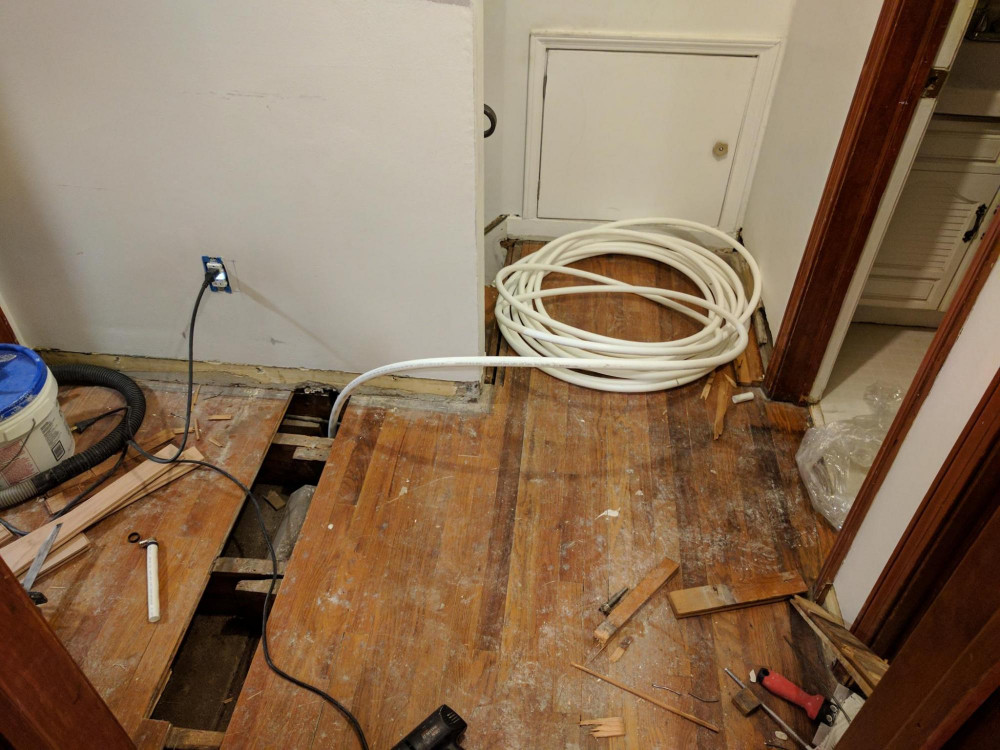
 You will find in the gallery below that I decided to re-run the plumbing while I had easy access to the piping. Most of the plumbing leading to the bathroom has now been replaced, and the remainder will be completed during the kitchen renovation once the joists are exposed. For simplicity, I used SharkBites to join the copper to the PEX as it is a temporary joint. This will be solid PEX in the end, so I am not concerned with sealing them in an inaccessible area for the time being.
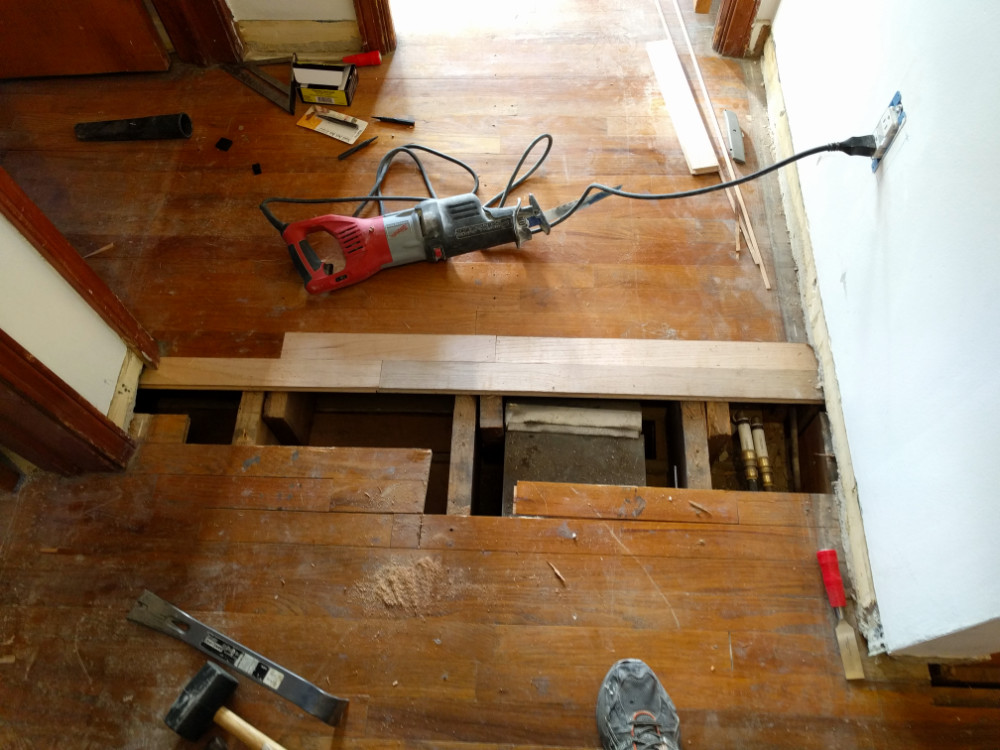
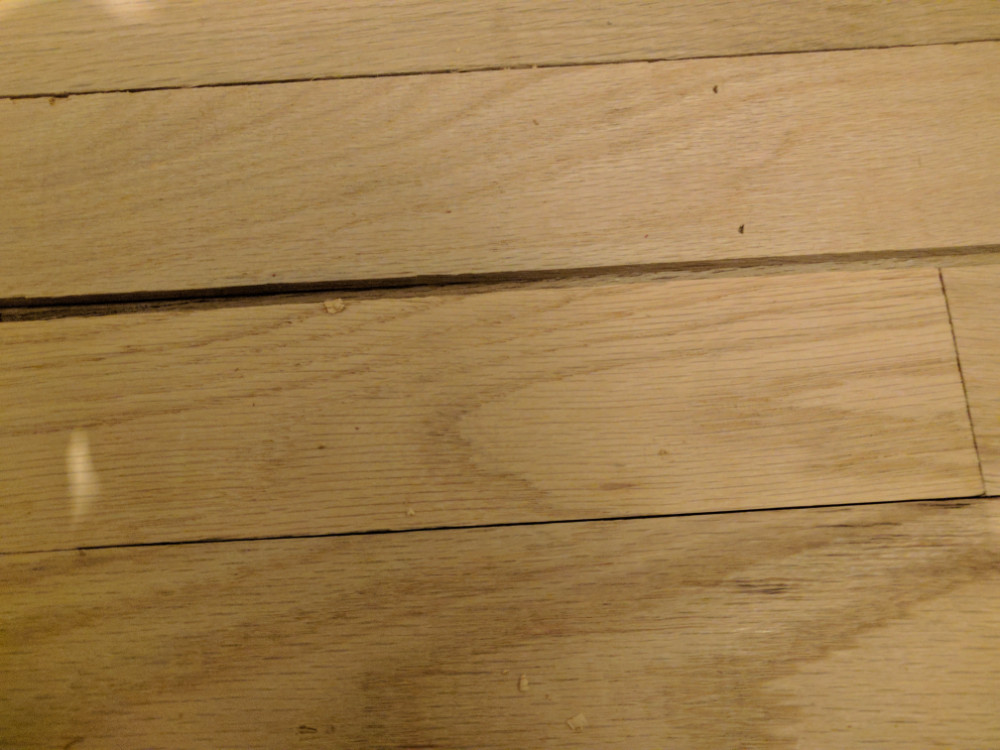
You will find a photo showing a gap and finished shot of a joint in the gallery below; this was the sticking point I referenced above when completing the hall. This section of boards had significant gaps between them due to a failed joist fastener and years of settling, causing the joists to fall out of square, buckling the flooring. I forgot to photograph this process, but I jacked up the floor from below, replaced all of the fasteners, and re-squared the joint with a planer when I still couldn’t get it perfect. This eliminated a large amount of the gaps in the hall, but it still wasn’t perfect. I took a scrap piece of the hardwood and hand-cut a wedge that I was able to glue into place. With a little bit of hand-planing and some sanding, you would never know it was there. I am aware hardwood expands and contracts, and that this wedge may freak you out, but rest assured that all of the surrounding boards have more than enough space to shift.
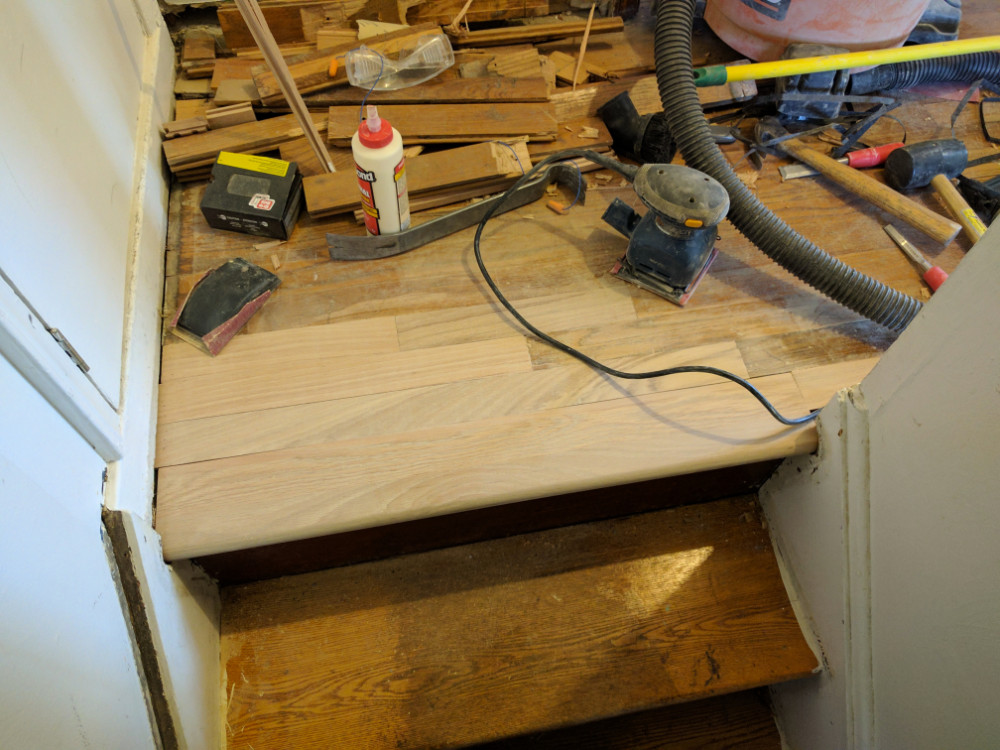
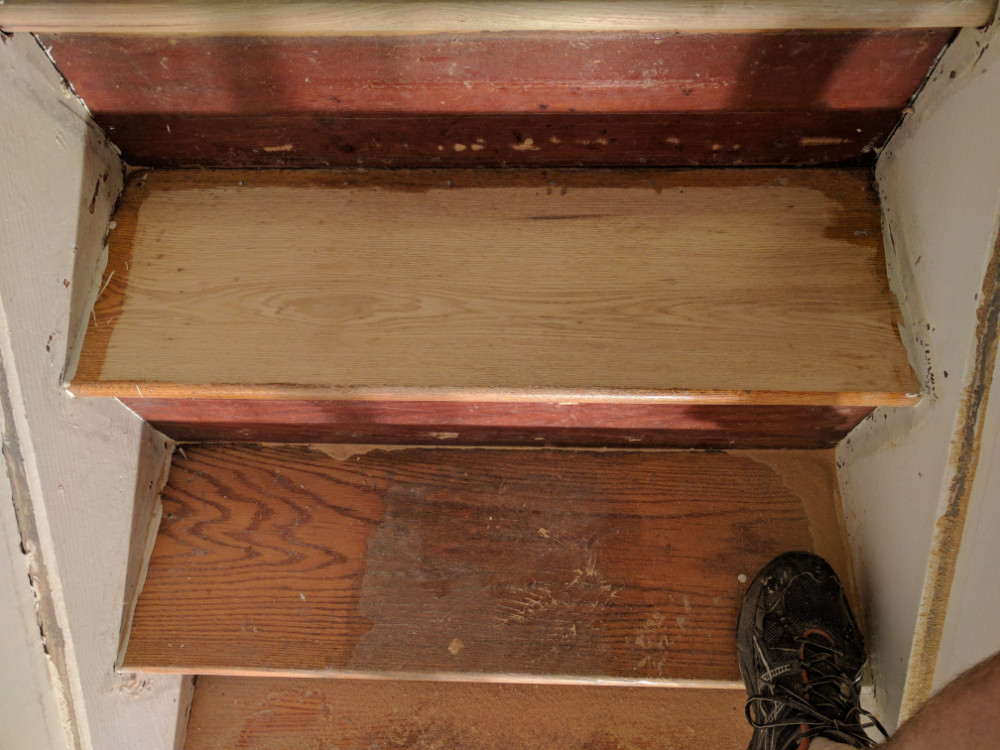
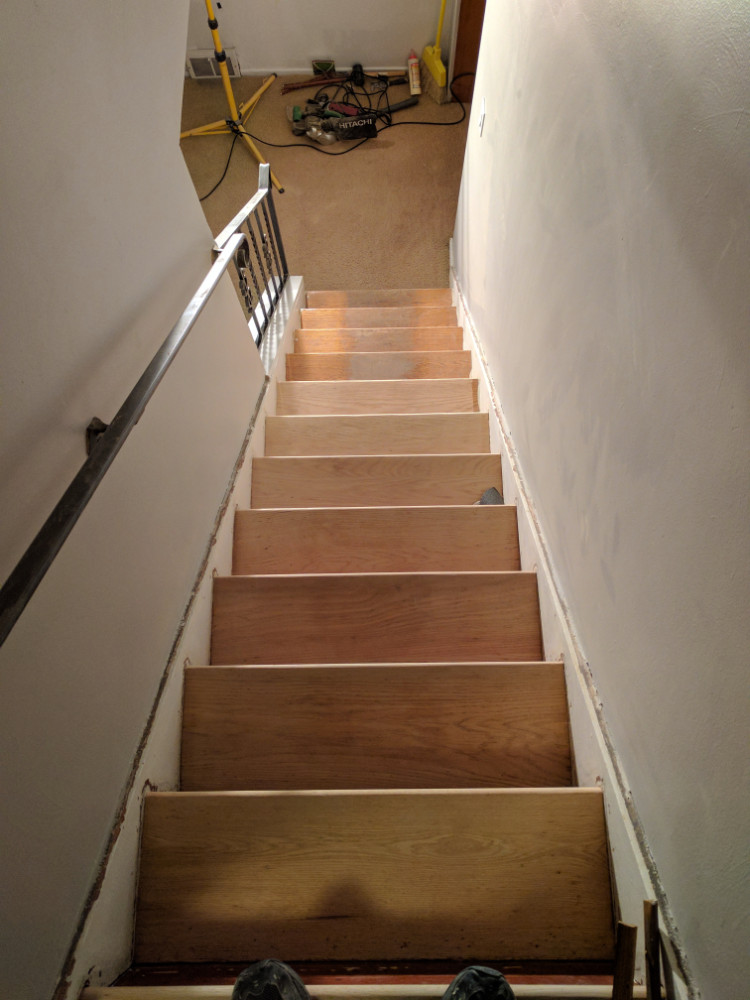
When replacing the top of the stair tread and fixing the gaps, I found again that the house wasn’t even remotely square. This left an odd gap under the tread that more than likely was the cause of the initial failure. To compensate for this, I had to route a pocket into the back of the tread. I would have had to do this anyway to get the new tread to match the height of the wood floors, as it was about 1/4″ thicker than the flooring itself.
As you will find in the finished photo, the tread still did not align perfectly, I decided that the amount of time to make this perfect wasn’t worth it in the long run. It was only off by about 1/32″, so it would be remedied by the floor sander once we got to that point. This is also just me being critical of my work; I am a perfectionist, but realized even after pointing it out to my friend and father, that it still wasn’t visible to anyone but me.
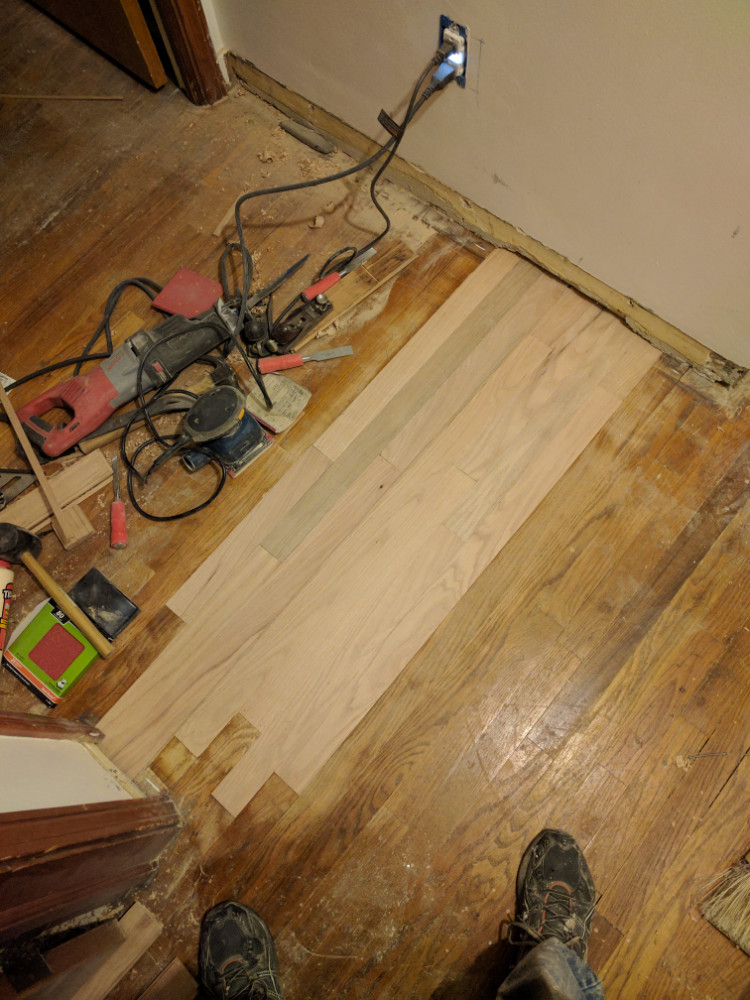
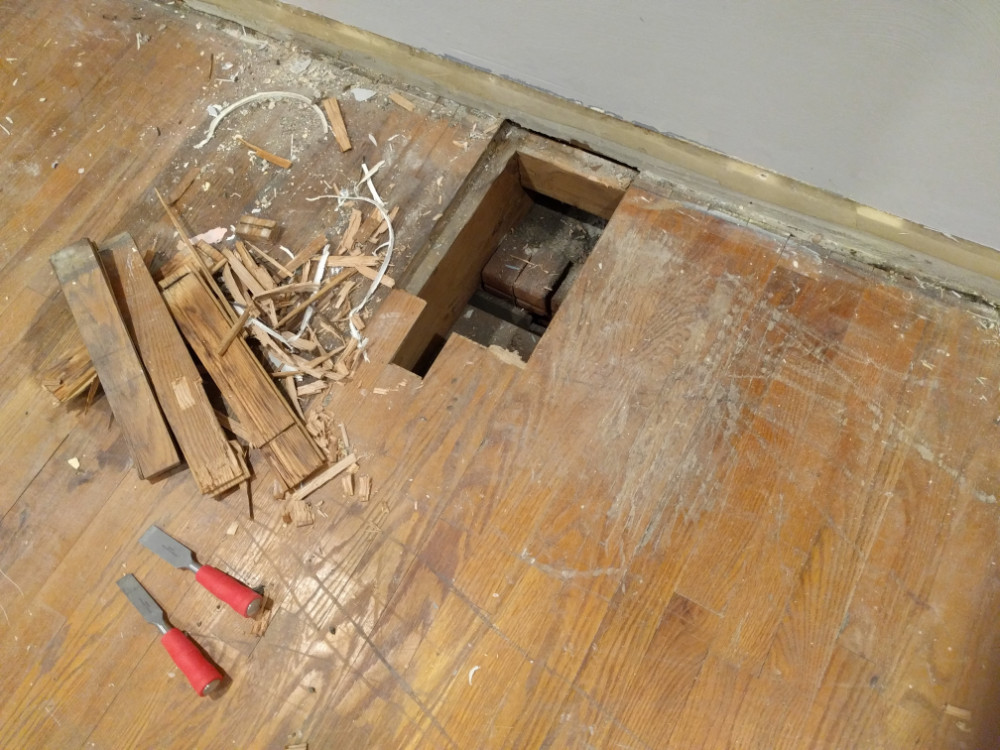
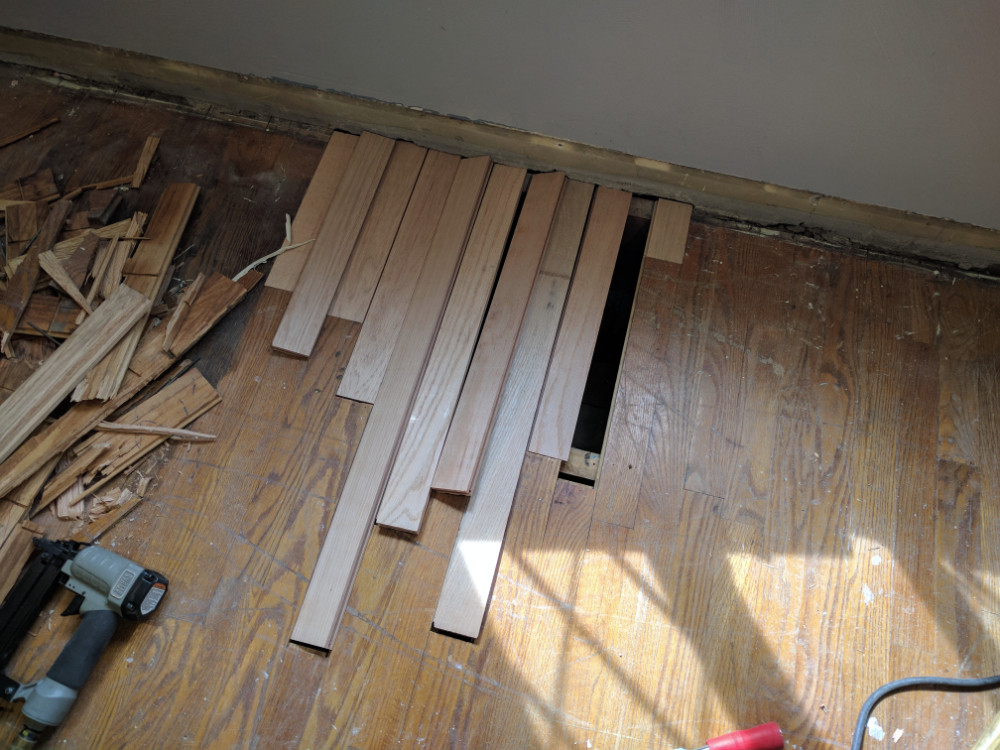
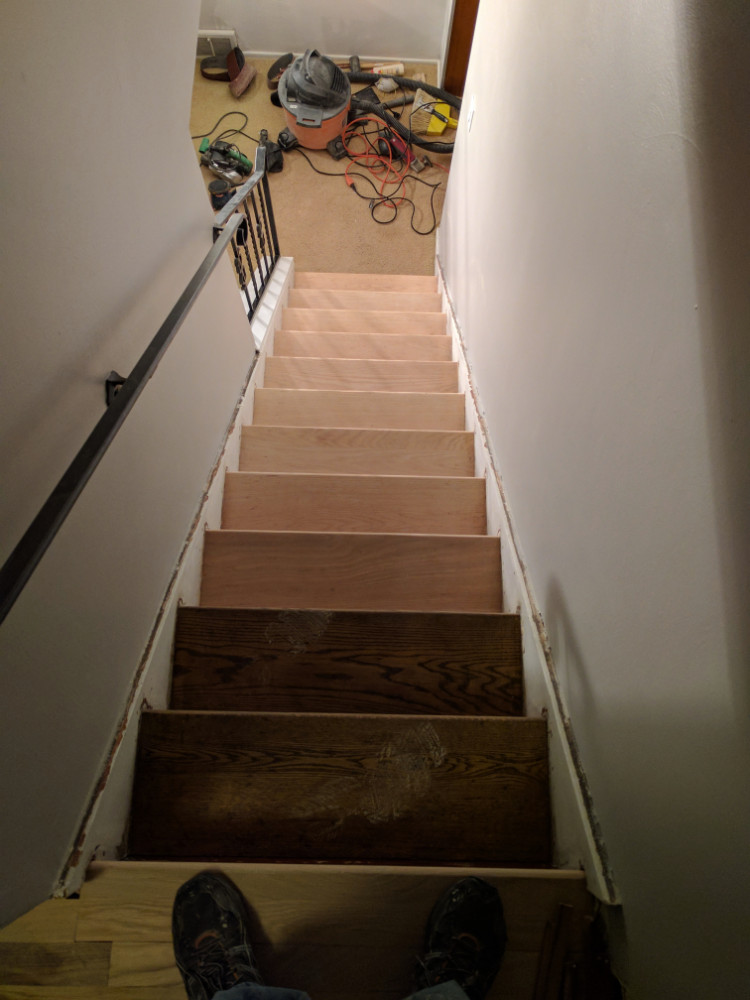
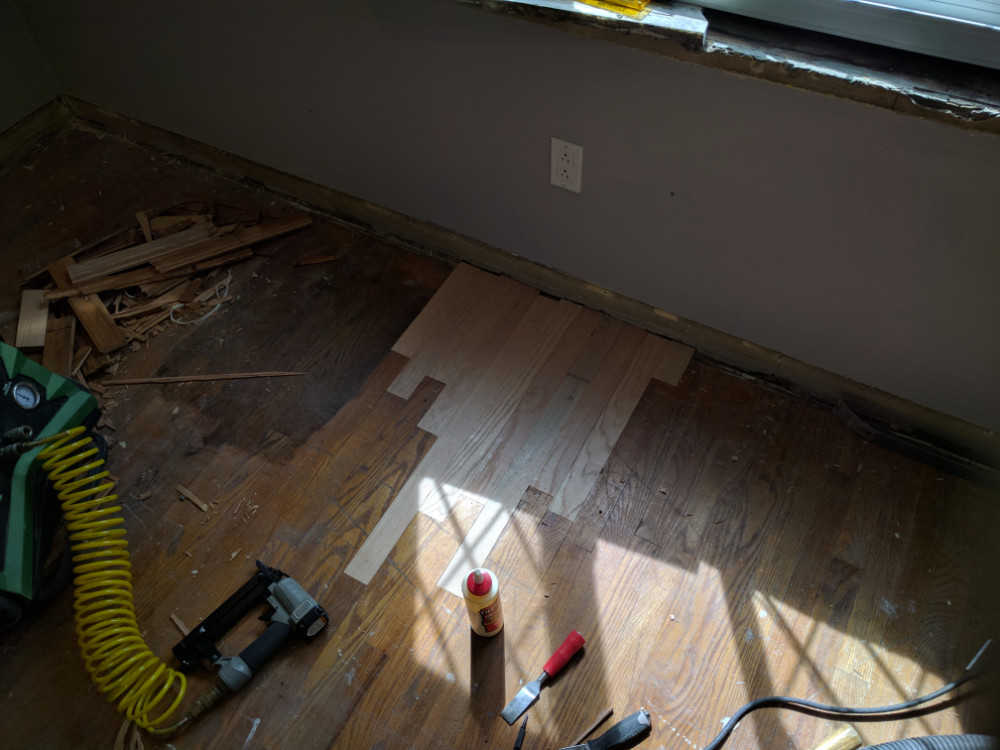 Lastly, the second bedroom needed the rotted section of flooring removed before we could sand. This process followed the exact same procedure as the hallway, minus the floor re-leveling. Everything slipped right into place, and as you can see to the left, I was able to accomplish a perfect fit straight out of the box with no shimming. This is how a hardwood floor should go in if everything else is square.
You have probably been wondering how you patch the middle of a tongue and groove floor and get the last board in, right? There isn’t any magic going on here, just a little bit of modification to the unseen part of the floor board. To get the last board in place, take a chisel and knock off the bottom of the tongue on the end and side of the board. You may also have to remove the tongue on the end of the board if you aren’t against a wall giving space to slide that into place. Drop the tongue of the board into the adjoining groove, and then drop the groove side of the board (you removed the bottom of this groove) onto the tongue of the next board. It should drop into place, but you might have to sand a little bit or lightly tap it into place if it is a tight fit as it was in my case. To prevent this last piece from popping out, I used stainable Tightbond II wood glue around the perimeter and a handful of thin finishing-nails.
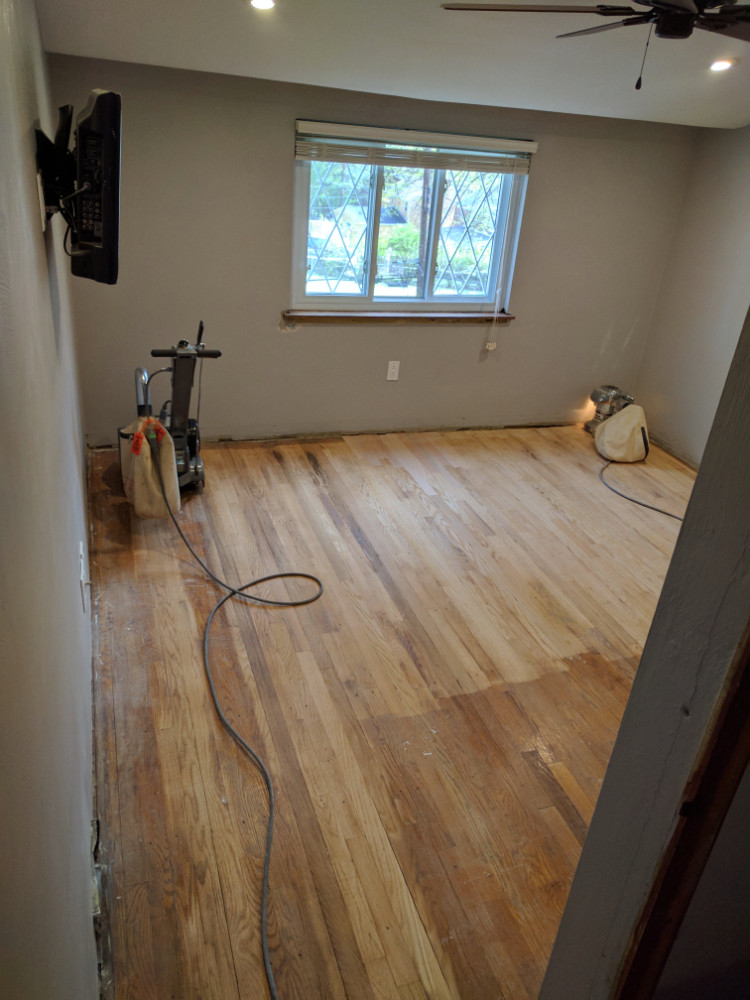 If this process didn’t seem labor intensive before, it is about to get crazy. I highly recommend going over every single last inch of the floor plucking out every staple and nail, countersinking any nails that may have been put in to eliminate squeaks in the past (my floor had one in nearly every board over every joist). Keep in mind resurfacing machines are very expensive and rental companies don’t like damaged equipment. Nails and other hard objects ruin these machines, along with the expensive sandpaper you bought.
 I won’t go into detail about using the sanders as it can best be described hands-on. Drum sanders are AGGRESSIVE. Take it easy only putting light pressure on the drum until you get the hang of the machine. Only pull it in the direction the boards run, NEVER perpendicular to the boards. In addition, never ever stop unless the drum has been lifted, lifting the drum as you finish pulling, that way the wood is feathered eliminating sanding lines. When completing my floors, I used 24, 48, 60, and 80 grit. I rented an edge sander and also used the same grits to complete those areas and the closets. You will be amazed how much paper you go through, especially if your floors are painted, like the closets were in my house!
While on the topic of sanding in enclosed spaces… I HIGHLY recommend sealing off all air vents, stair wells, and any room that you don’t want covered in dust. The rentals I had were fantastic and didn’t make much of a mess, but the hand sanding of the stairs and corners made quite a mess covering every surface in the entire house. Wear a good respirator. Period. Most old paints and floor coverings contained toxic chemicals and heavy metals such as lead and formaldehyde. This process will kick all of that into the air in amazing quantities. ABSOLUTELY wear hearing protection. No questions asked. Sanding took around 30 hours to complete, and it will absolutely damage your hearing if you aren’t careful. The sound of the sanders was clearly audible through the brick wall from my neighbor’s house and honestly sounded like I was tearing the place down.
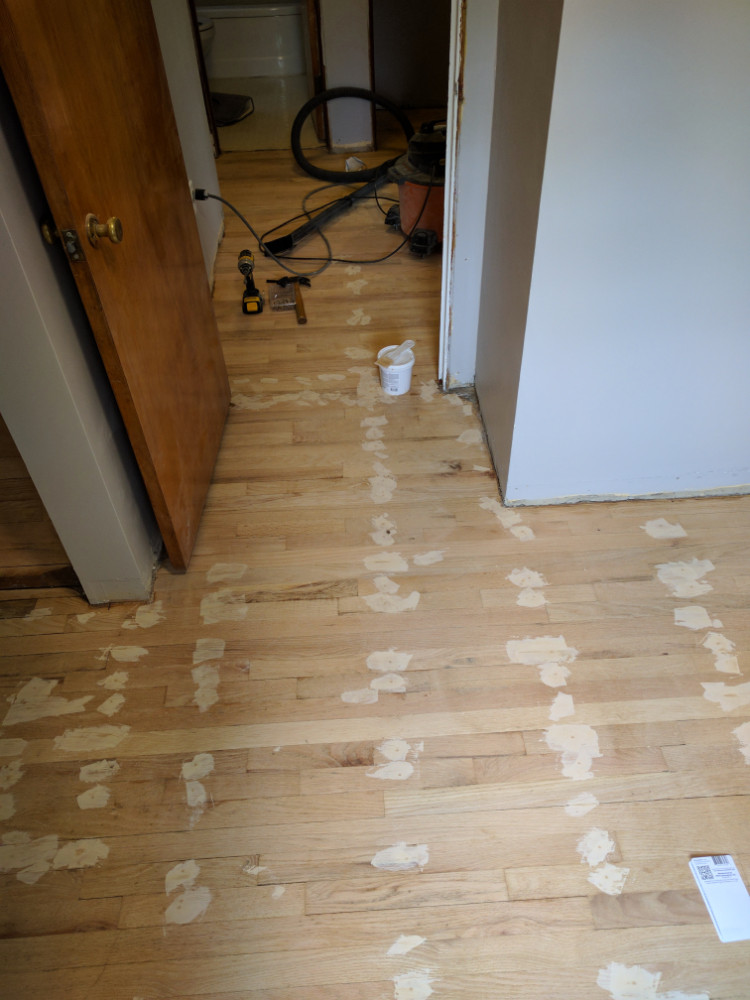
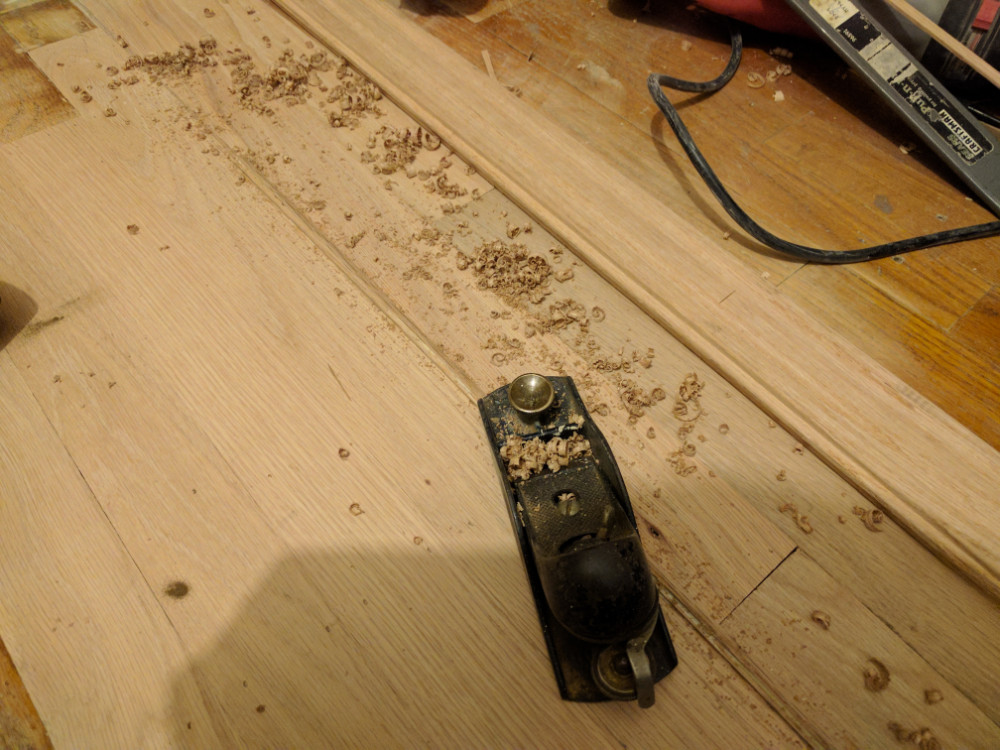
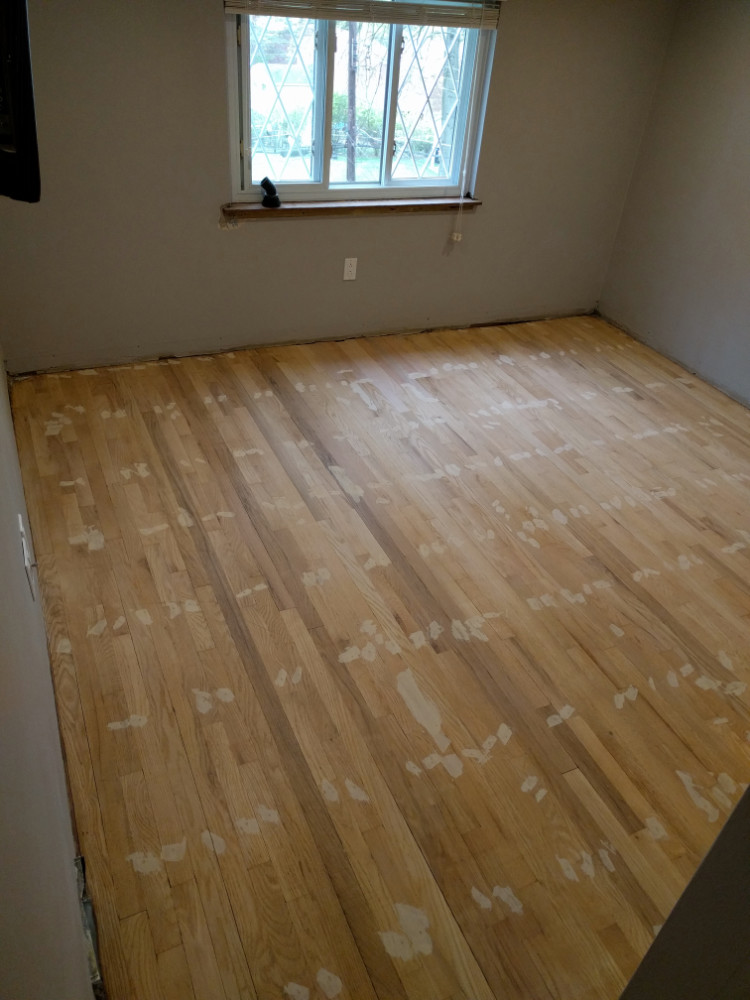 After completing the drum sanding, we went around and re-countersunk the nails since a lot of material was removed. I then went around with full trowel red oak wood filler and covered over the nails, cracks, and any small defects. The photo to the left shows just how many nails and defects were in the wood. I would highly recommend NOT filling the gaps between boards. These floors will expand and contract a lot more than you would expect. Over time that filler will fail and the cracks will re-appear. If you are using a dark stain, you will see the bare wood and light coloring between the boards as the filler crumbles and gets worked out. I guarantee this isn’t the feel you are going for.
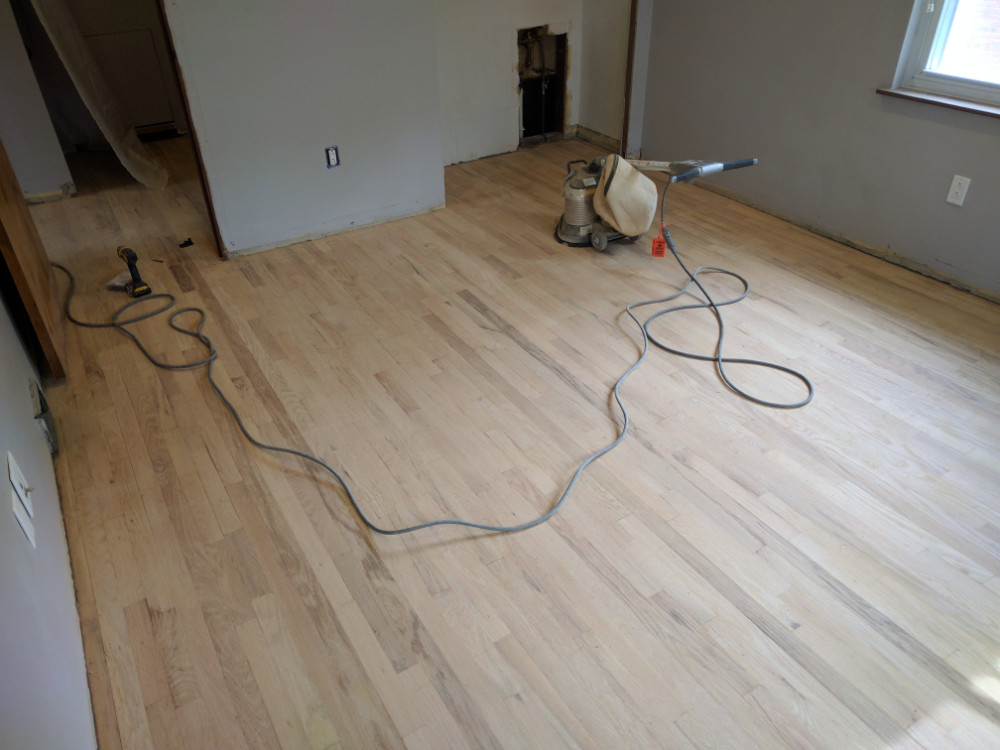
At this point I went out and rented a second floor-sander, this time a three-pad random orbital and the same edger as before. I stepped through the grits, working in any direction over the floor to remove sanding marks. This machine is not very aggressive, so even after finishing the last round with 80 grit, I went back to 60, then 80, 100, 120. Go over the floor with a fine-tooth comb looking for any sanding marks. I missed a few spots and they really showed up when staining the floor.
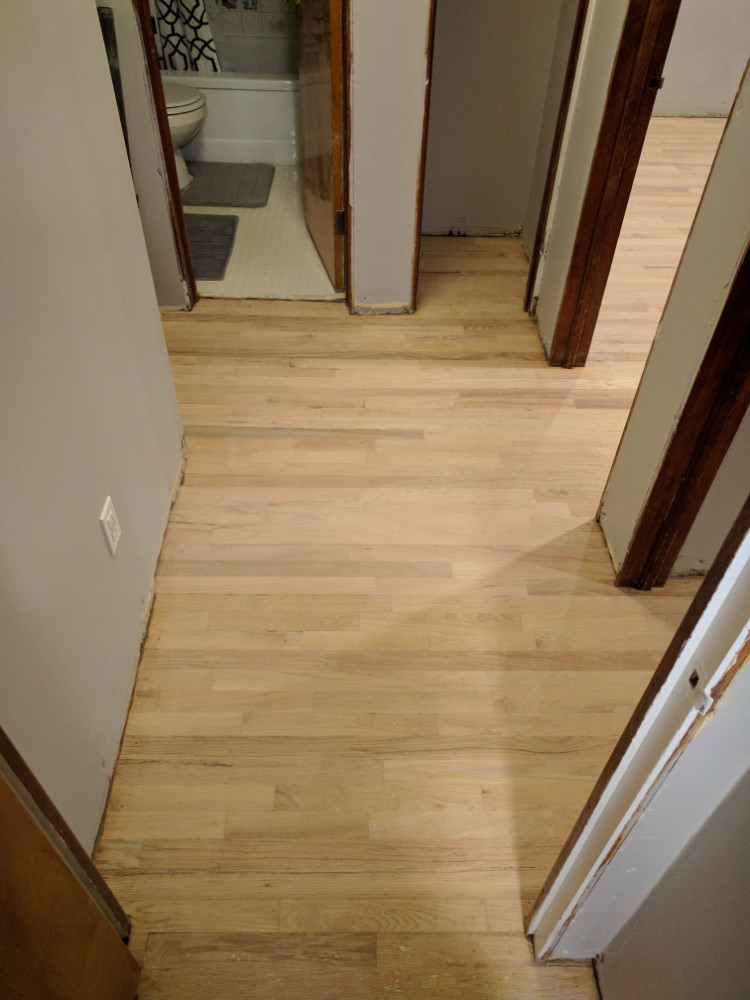
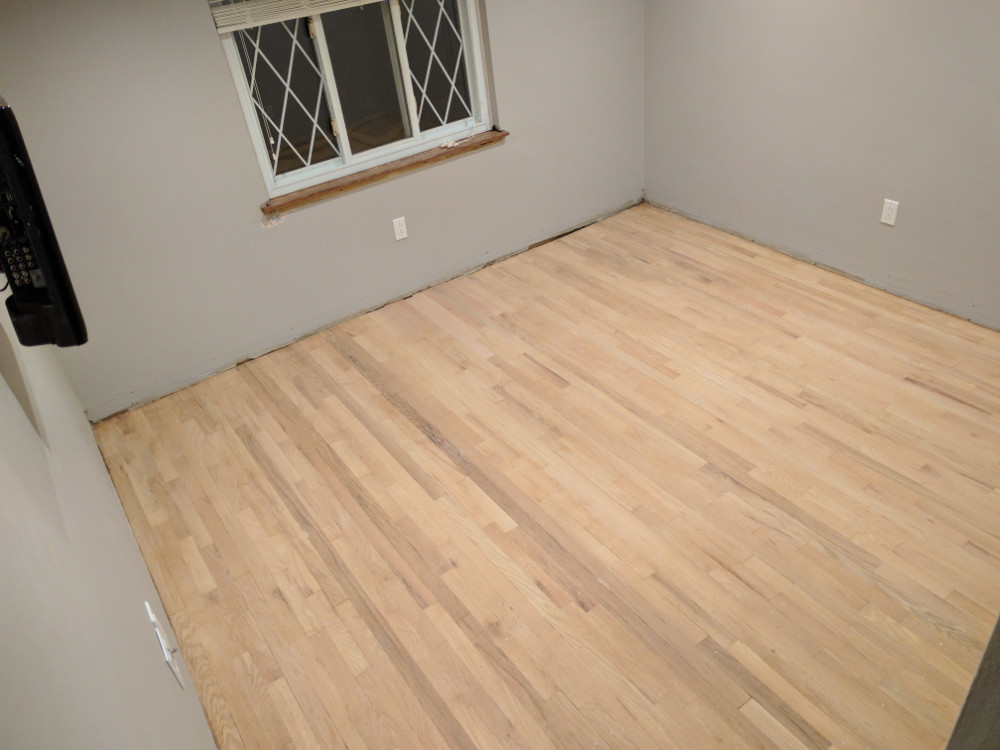
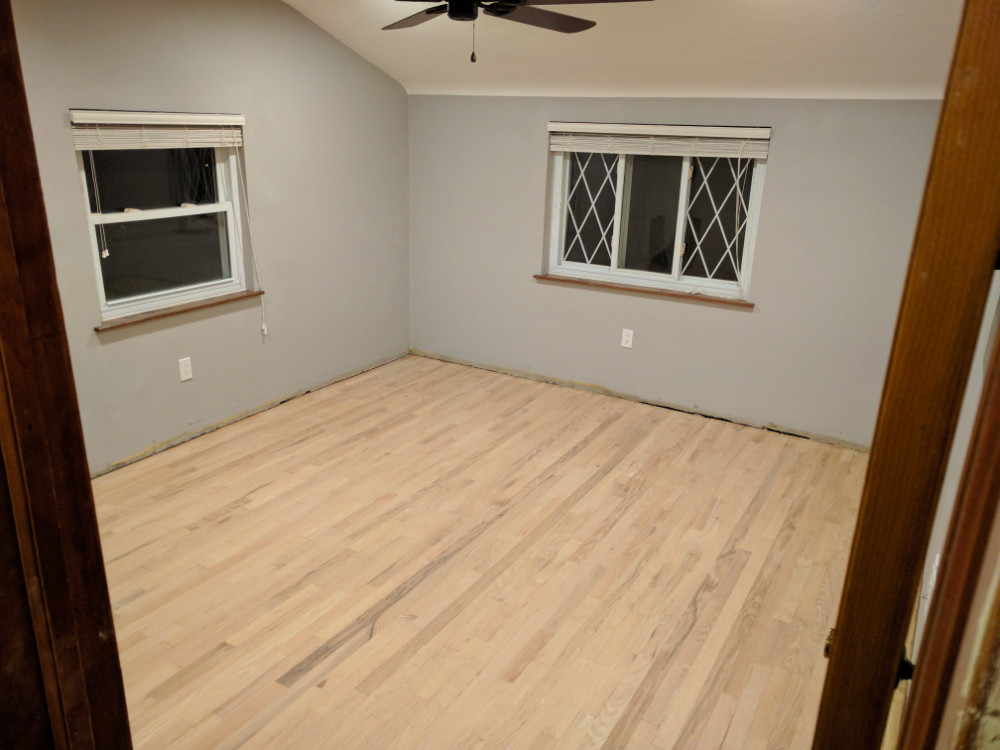 You’ll know when you are done once the floor is completely bare, even, and has zero scratches, swirls, or any defects from sanding. One important thing to note, between every single grit, vacuum extremely well. Any dirt, grit, or heavy sawdust will mar the floor when you move to a finer paper. It will just make more work for you or ruin the final finish. I still can’t believe how fantastic the floor looked when it was sanded, far better than I had expected given the original state. Even the patches I did were invisible.
This is a very long blog post, but the amount of detail and effort that goes into something like this takes a good bit of discussion. Many details are still missing, but the photos and doing your research should fill in the gaps! Following sanding, I cleaned everything better than this house has ever been cleaned. I even went as far as damp-toweling off the floor to ensure every last piece of dust and grit was gone before staining.
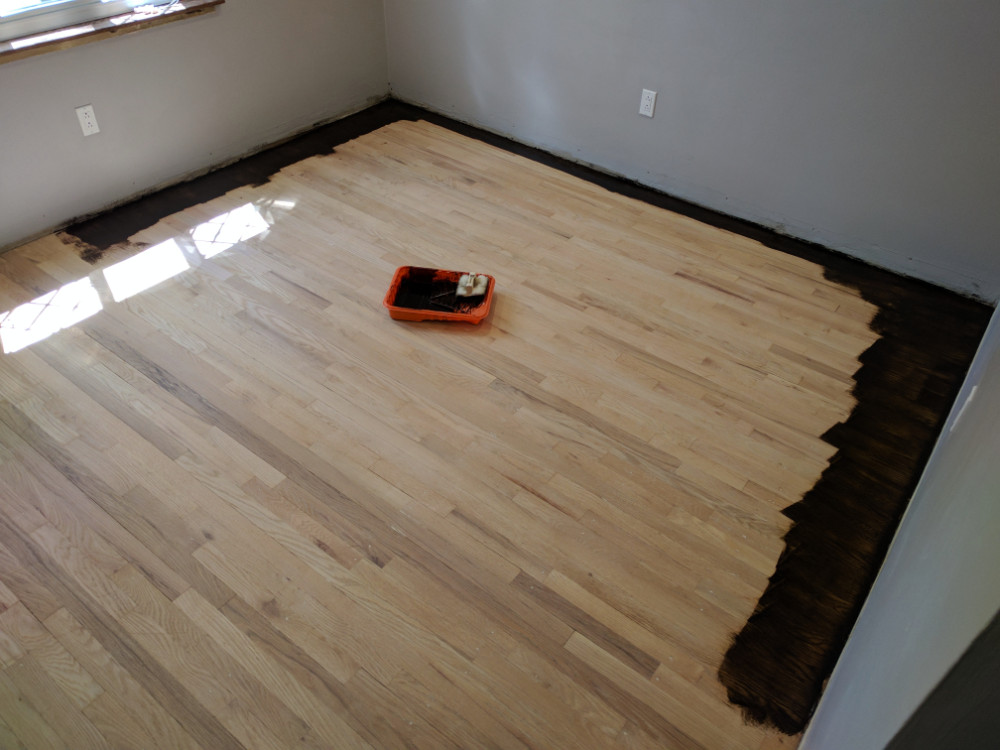
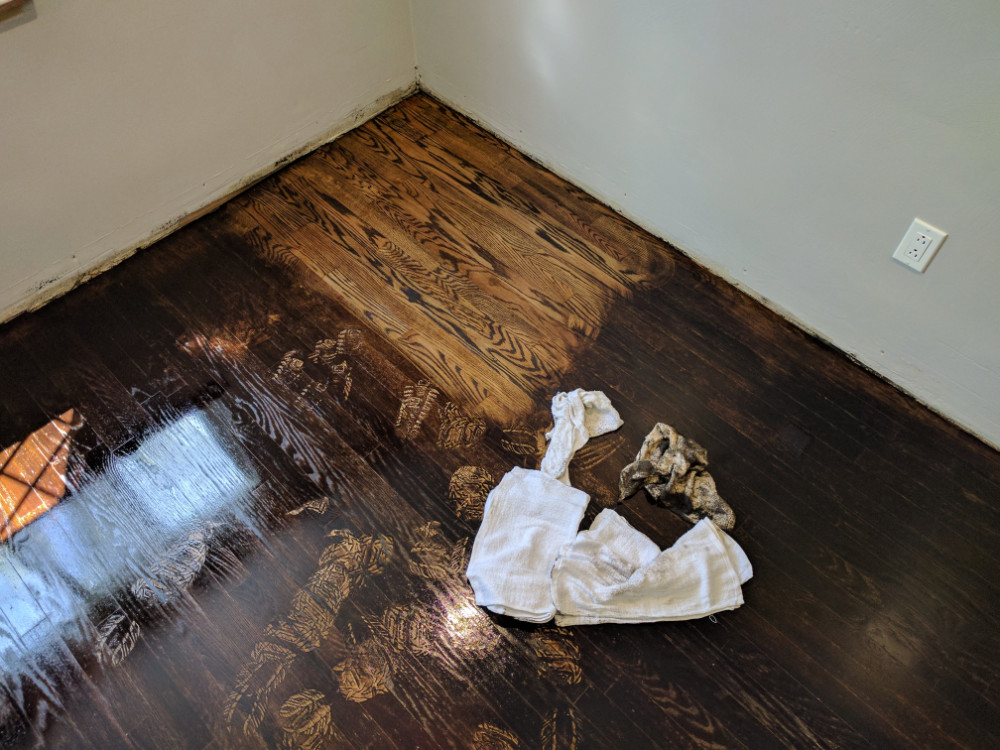
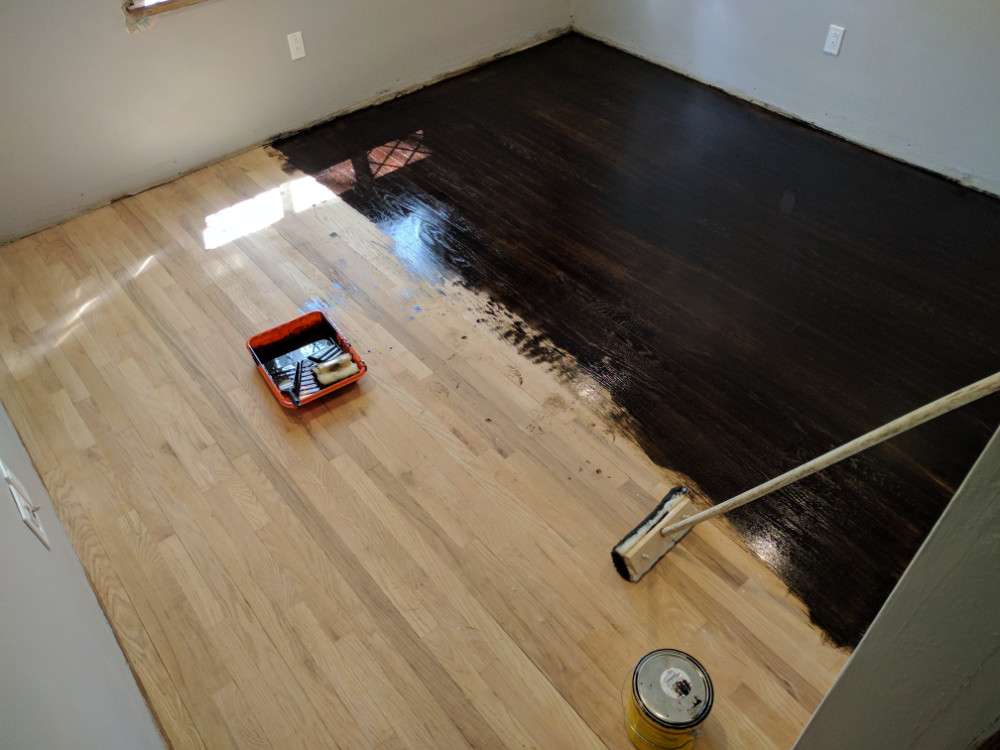 I used a lamb-wool applicator to place the stain on the floor. It holds enough stain to keep spreading a long time, and places an extremely consistent coat if you are careful. It also doesn’t shed and prevents bubbles. I used an oil-based dark stain to bring richness and warmth into the house. After applying the stain, I let it sit for 30 minutes. Following that, I used a LOT of painter’s rags to wipe up the excess stain. I didn’t seal the floors beforehand because I wanted the grain to pop, and knew I sanded well enough there wouldn’t be blotchy areas.
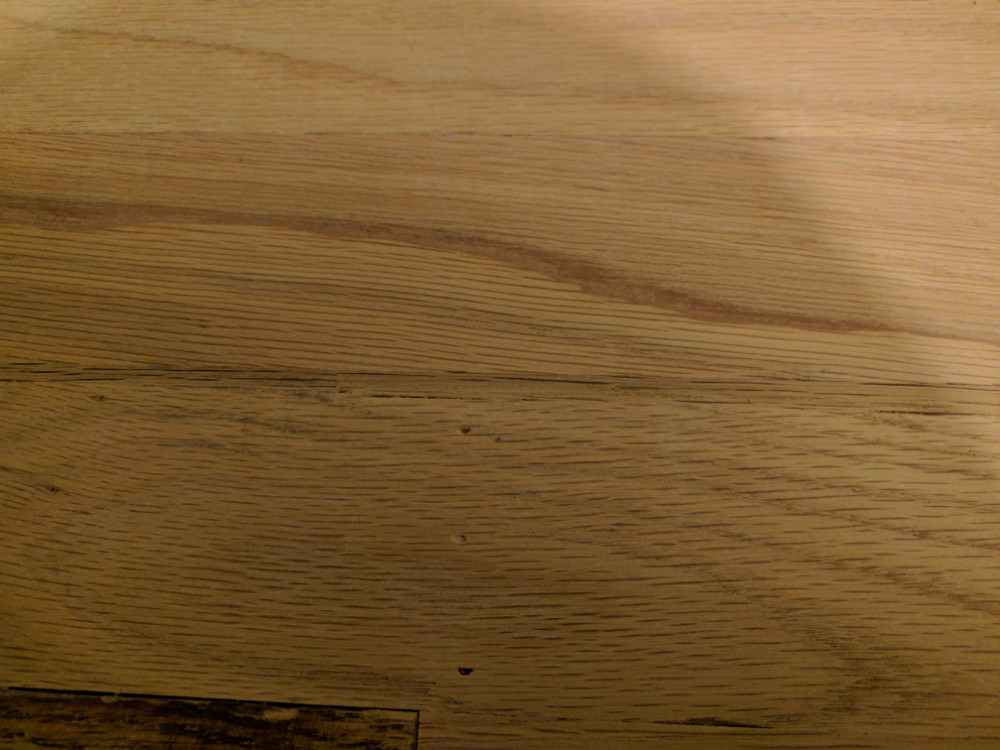
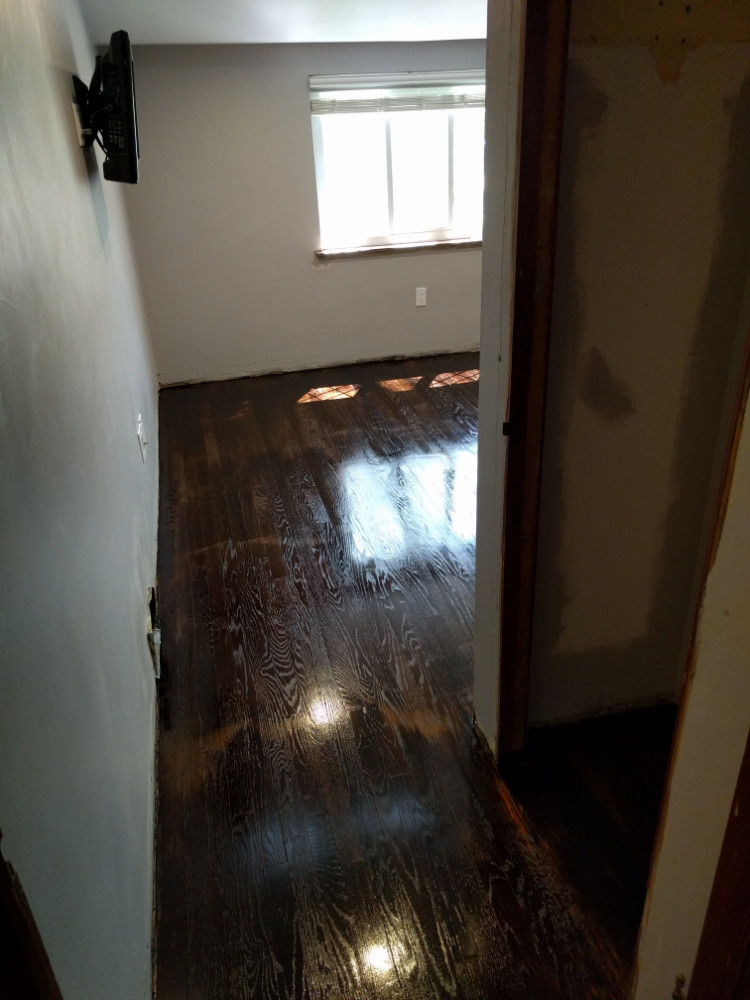
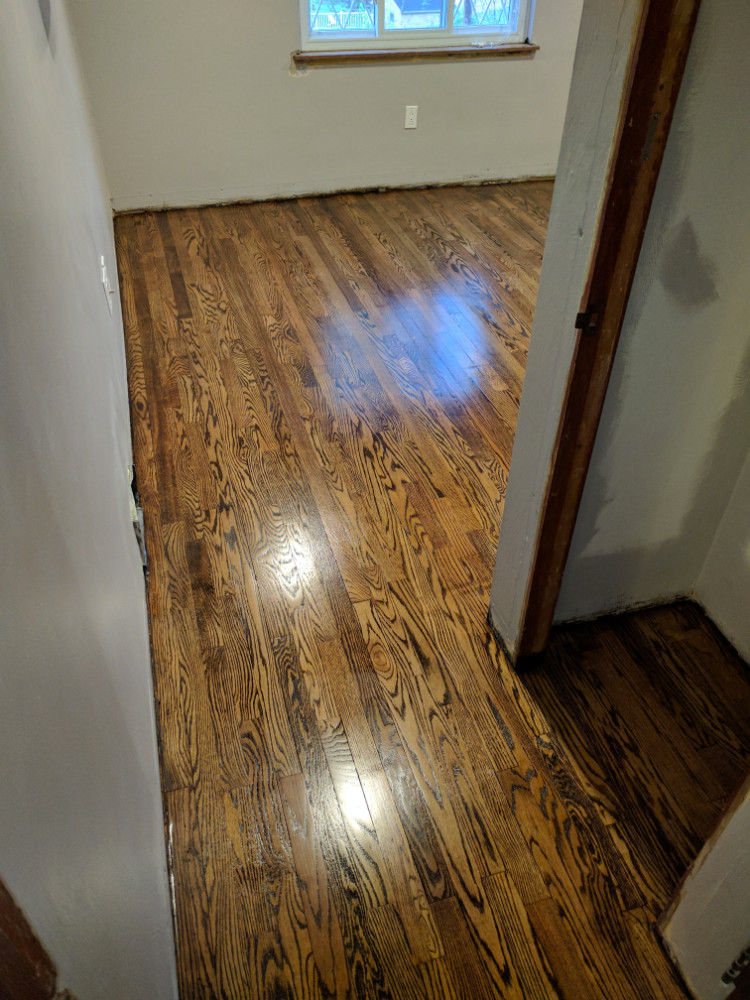
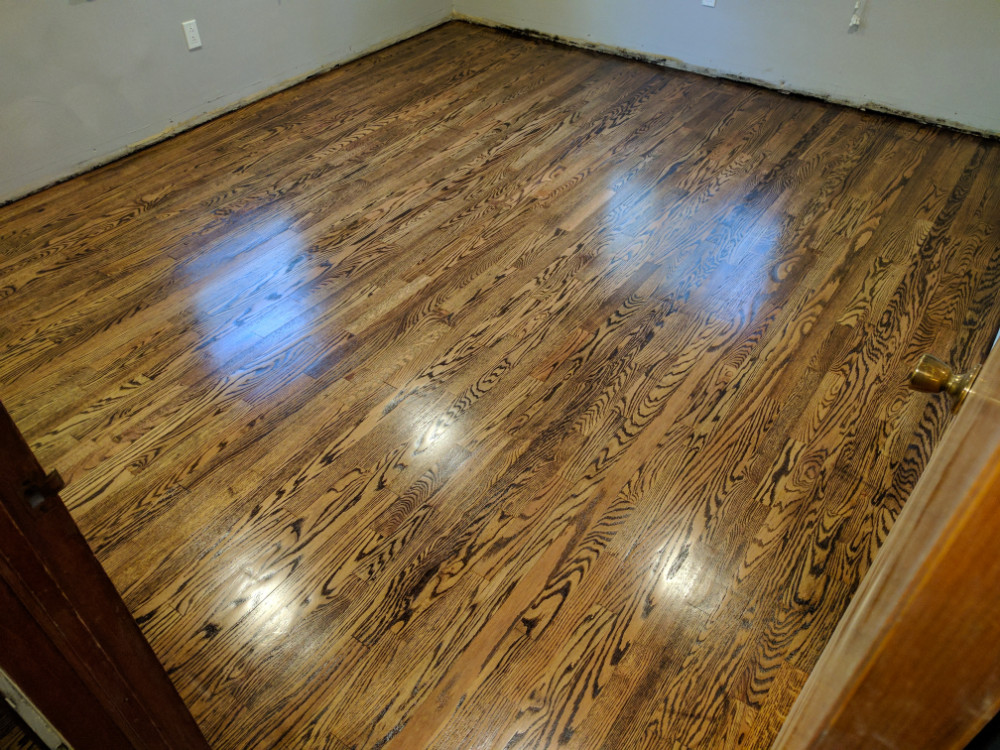
 As you can see to the right, these floors really show off their grain. I love the grain structure of red oak and wanted a unique and stunning display for these floors. Let the stain sit and dry for a full 24 hours before finishing it, or longer if the manufacturer states. I decided on just one coat because I liked the look so much and feared darker wouldn’t benefit it. I used a very high quality Varathane low VOC polyurethane in satin. I feel flat doesn’t have a good look or feel, and gloss will show every imperfection, footprint, scratch, and will only dull out over time.
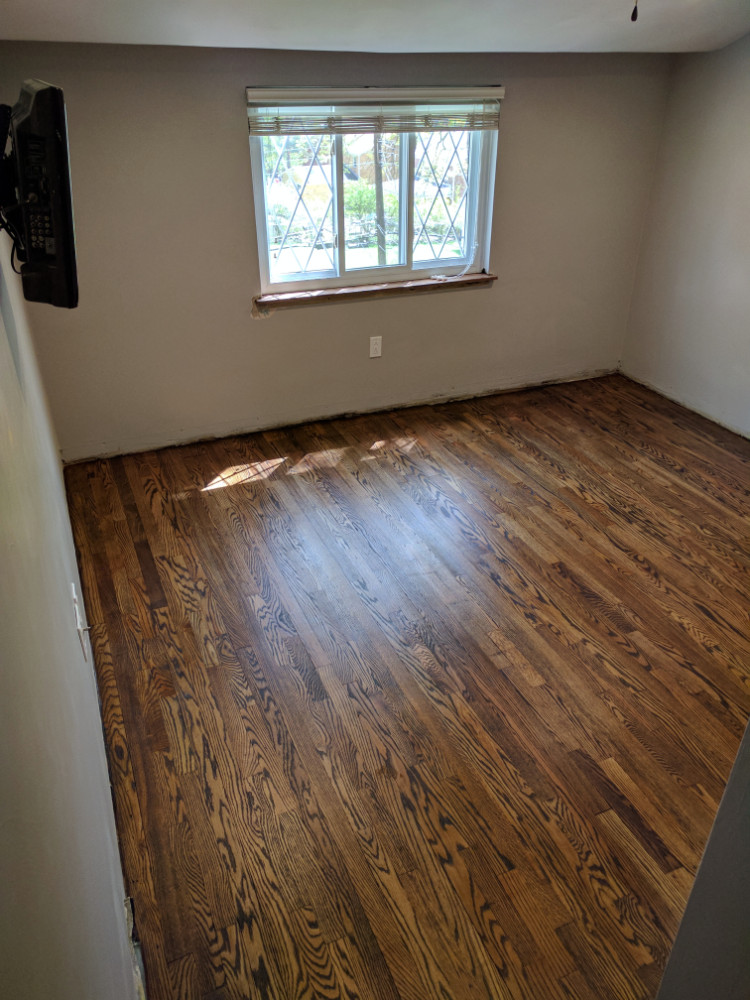
 The polyurethane was applied in two heavy coats (supposed to be 2-3 light coats per the manufacturer, but it was winter and this stuff STUNK), spaced by about 8 hours each. Any less time and footprints would have been an issue, any longer and the floors would have required sanding in between coats after a full 24 hours of waiting. I will do this on the first floor to get a smoother finish, but I don’t think it will be much of an improvement over this. These floors look amazing and are extremely smooth already. As I have stated before, wear a really good respirator. Even the low VOC poly stinks enough it will cause health problems, especially if the house is closed up partially.
Following the application, I had to close off the air vents and leave the windows open in the dead of winter for several days. my heating bill may have gone up a lot that month, but it was the only way to survive in that house.
Overall this project was a fantastic learning experience. I now know what to do (and not to do) when refinishing the floors and hope the first floor will come out even better than this one. Until next time, take care and keep improving!