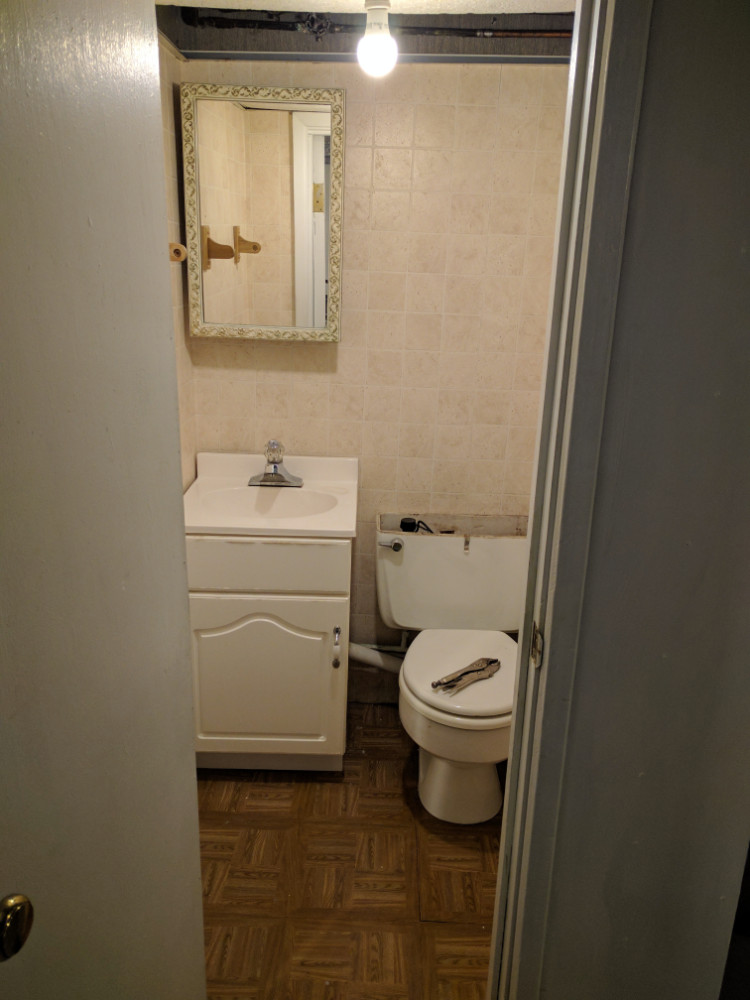
Since the day I moved into this house I would occasionally come home to the rare-but-too-frequent mild smell of sewage. I repeatedly tried to track down its origins to no avail, and attributed it to the venting issues in the basement. The issues were significant enough that the sink traps and toilet would be vacuumed dry several times a week. Every once in a while, when the upstairs toilet was flushed it would blow air out of the basement fixtures, followed by siphoning all of the traps. When the washing machine would empty into the basin, it would cause the sink in the adjacent bathroom to gurgle and evacuate. Plumbing problems in a basement usually signify untold horrors and massive expense to most people, but I see it as a fun weekend project!
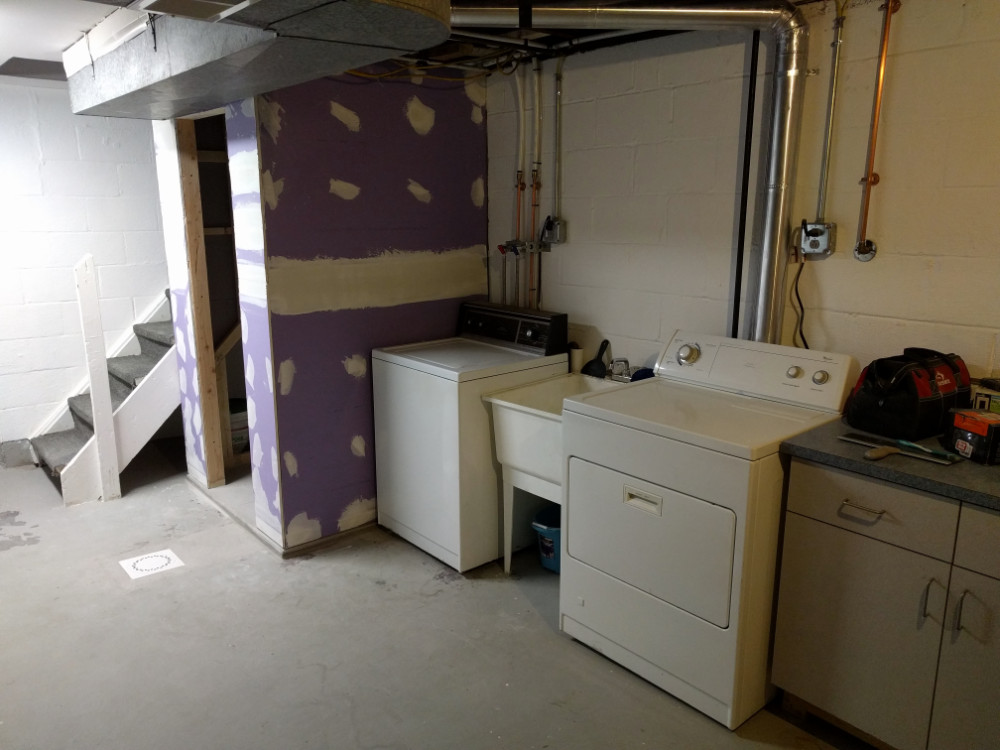
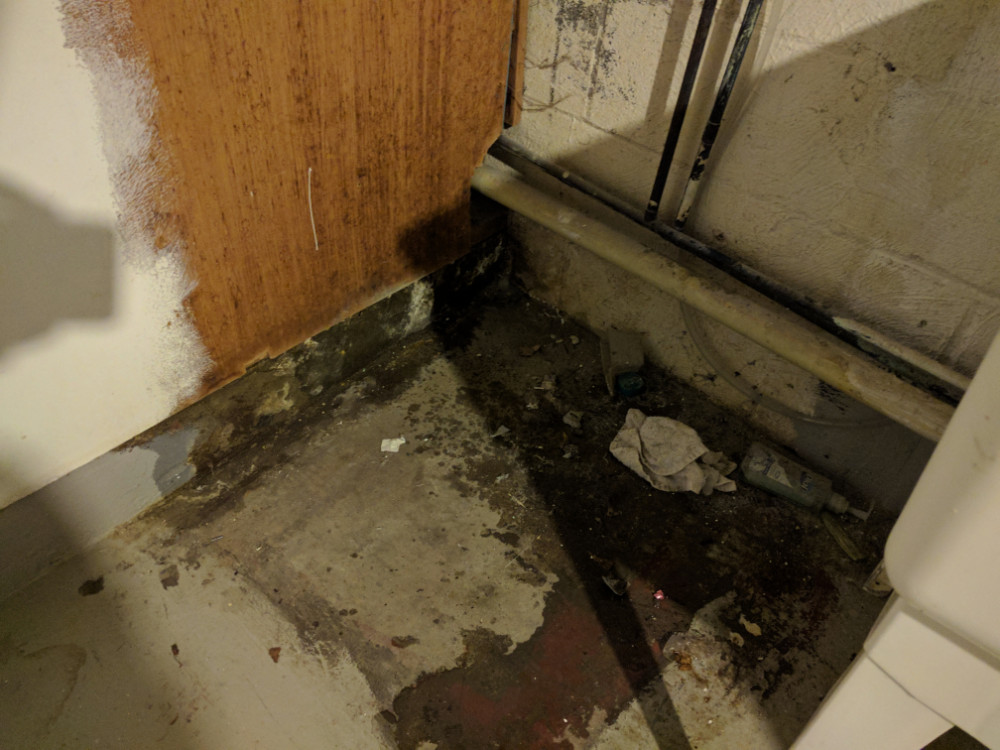
After coming back from California, I was greeted with a horrifyingly pungent smell that was strongest near the washing machine. To my delight, when I pulled it out of its resting place, I found water on the floor –sewage. You can see in the photo to the left, it wasn’t a pretty sight, nor was the unsupported surface mount plumbing. I immediately took to removing the wall face, finding more water and some white mold. I wasn’t able to find any obvious water in the bathroom itself, so the assumption was that the sink drain’s double-tee cracked where it went into the floor.
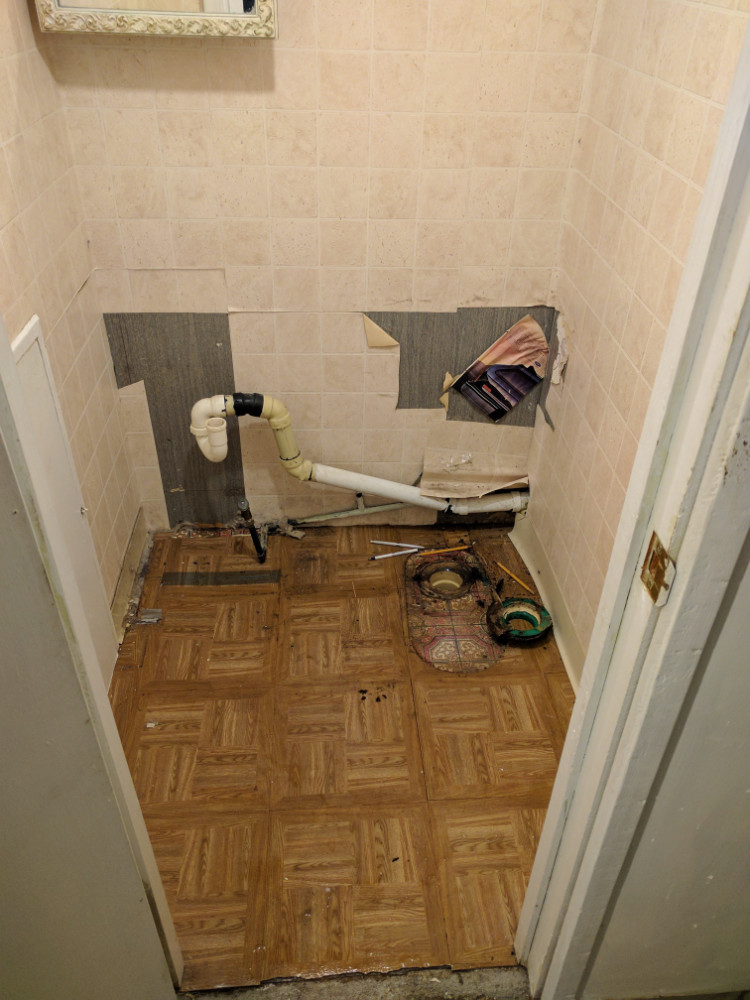
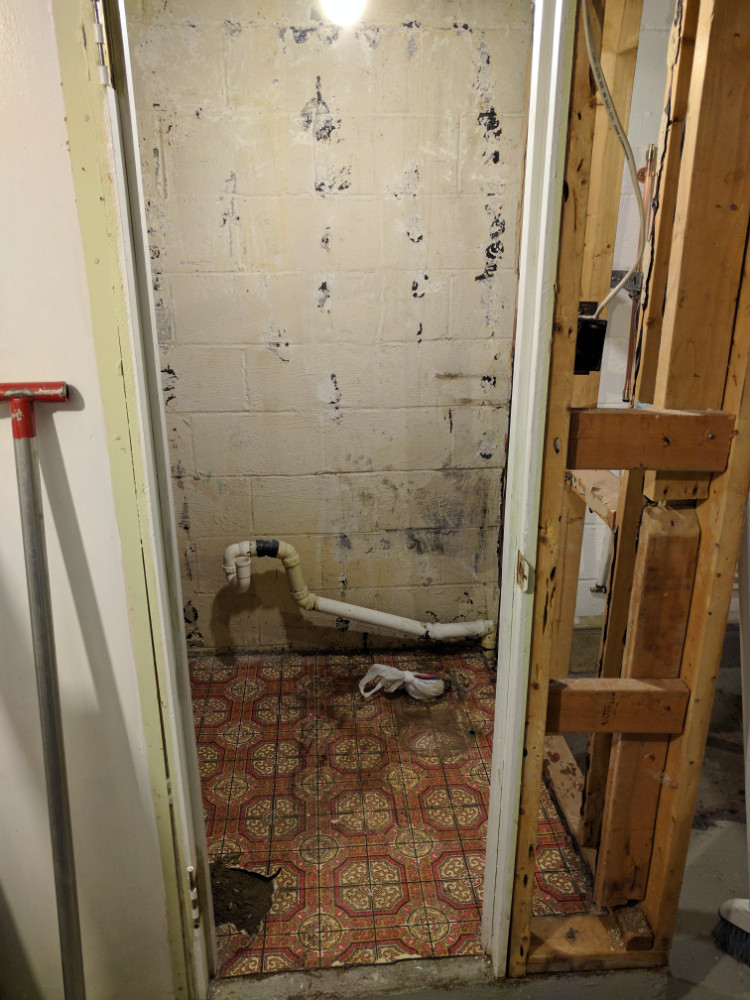
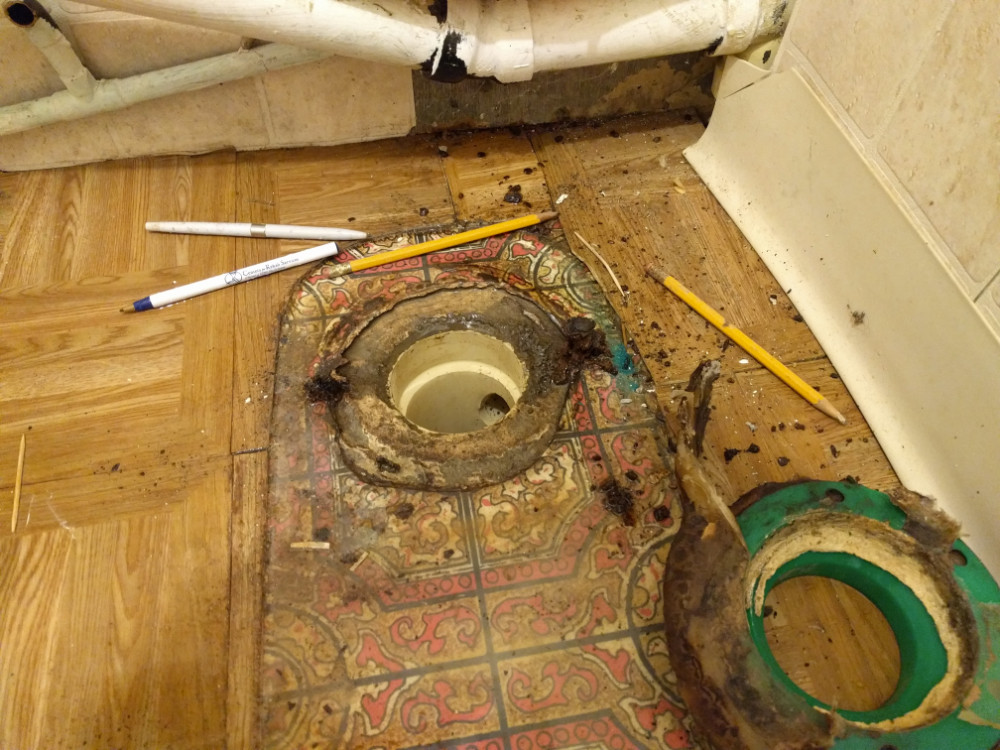 As I began demolition, I pulled the toilet from the flange to find something I didn’t want to see, but a lot of questions were answered immediately. The house was originally built with a Pittsburgh toilet and a floor drain. Nothing more, nothing less. Like many homes in the area, there would be a water line that could be used to shower that would dump right on the floor and down the main drain. The washing machine would also dump on the floor and find its way to the floor drain. The previous owners wanted a laundry basin and sink to finish the basement and bring things to a more modern state. To do this as you can see to the right, a sanitary tee was improperly installed and pounded into the closet flange. Next, the sink drains were installed onto the tee, and a massive 6 inch “stoop” had to be poured to raise the level to the top of the tee so a toilet could be placed. This lowered the height of the room so much that you had to duck if you were a 6-foot-tall behemoth like myself and needed to use the bathroom.
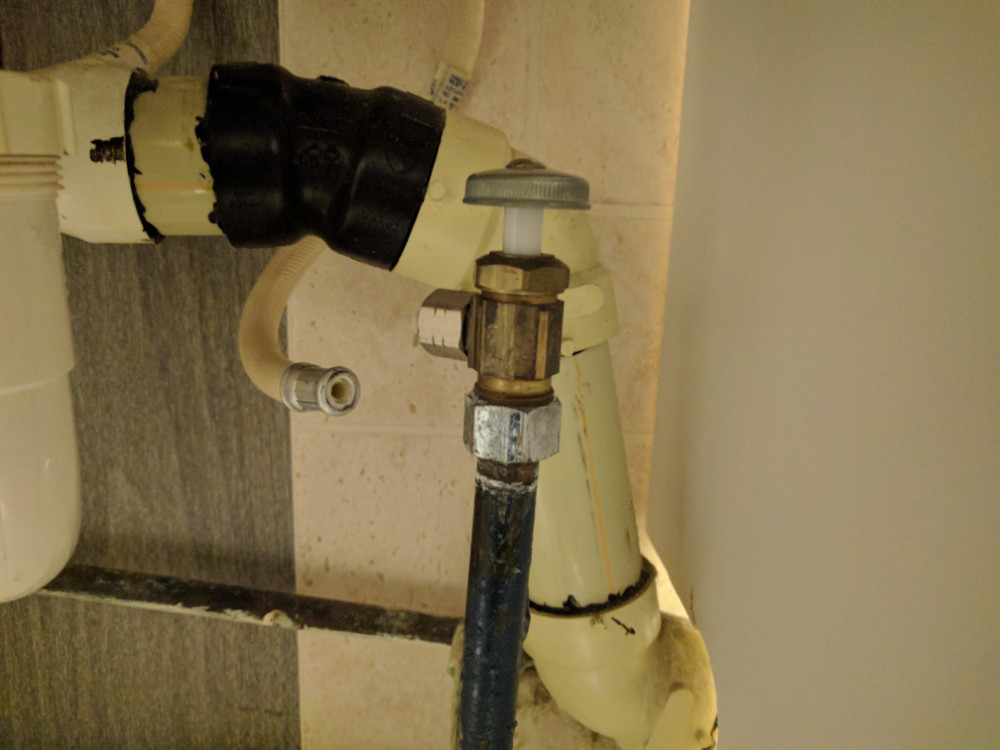 When the configuration above was completed, the toilet was placed directly on top of the concrete without a flange. The use of a tee here caused the toilet to force waste into the sink drains, and it was also leaking under the flooring and out into the basement under the washing machine. A wax seal can only do so much on an imperfect mating surface. As you can see to the left, that wasn’t the only issue. All of the PVC lines that were installed had joints glued with ABS cement and was a hodgepodge of PVC and ABS fittings. It was extremely easy to pull these fittings apart. Each of these contributed to the smell when the house was closed up for any period of time. The final nail in the coffin for this bathroom came when I went to remove the water lines from the sink. All of the compression lines broke right off. This was a pending disaster for sure!
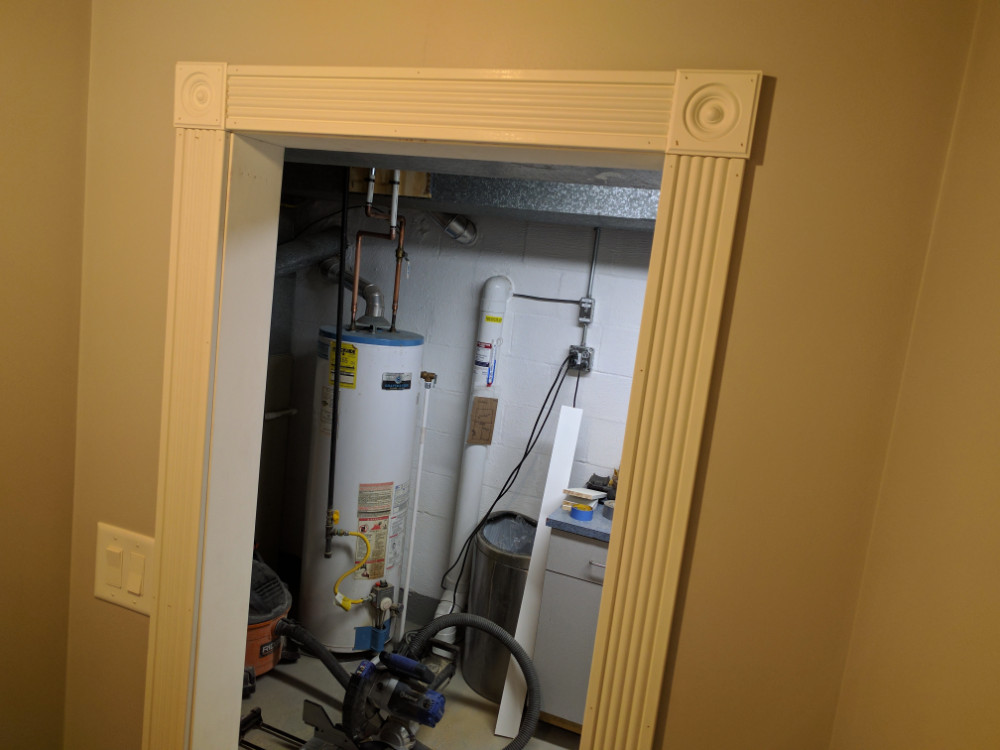
Due to the breadth of the sewer line replacement project I have broken this into two parts: the bathroom renovation, which you are reading, and the plumbing replacement. Please check that out as soon as I get it posted! <Edit: It is HERE!> You’ll get to see the rotted floor drain and brittle cast iron replaced with something significantly better. During this process I buried the sink drains to give the basement a much cleaner feel, and I also used this opportunity to give the washing machine its own drain line instead of having to use the wash basin –a decision I encourage anyone doing something like this to consider.
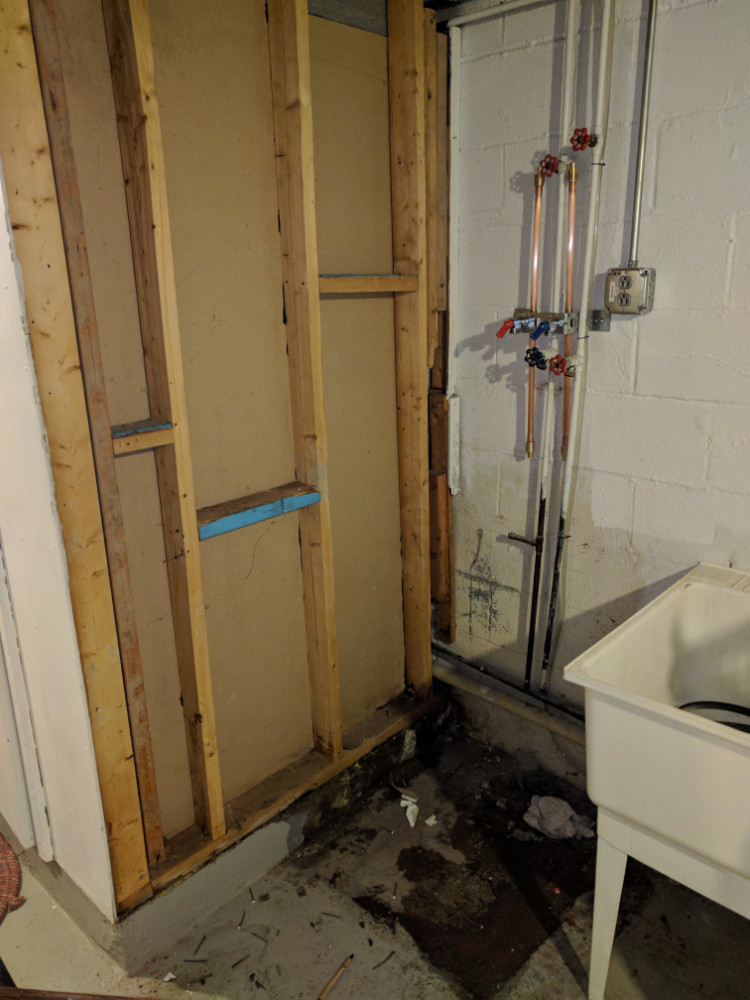
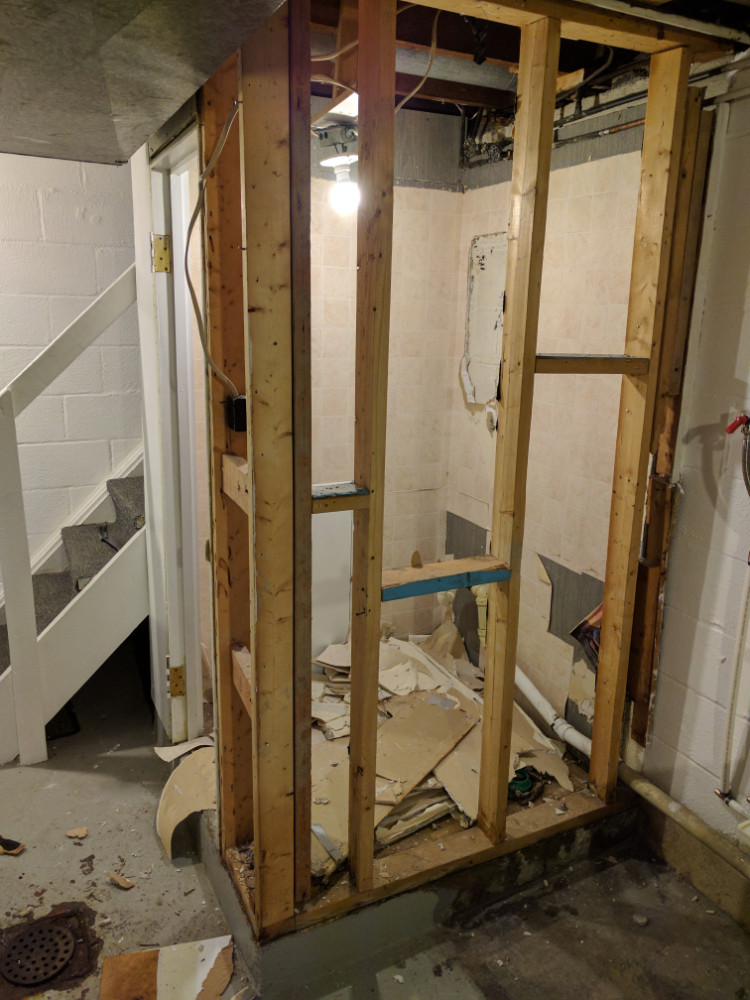
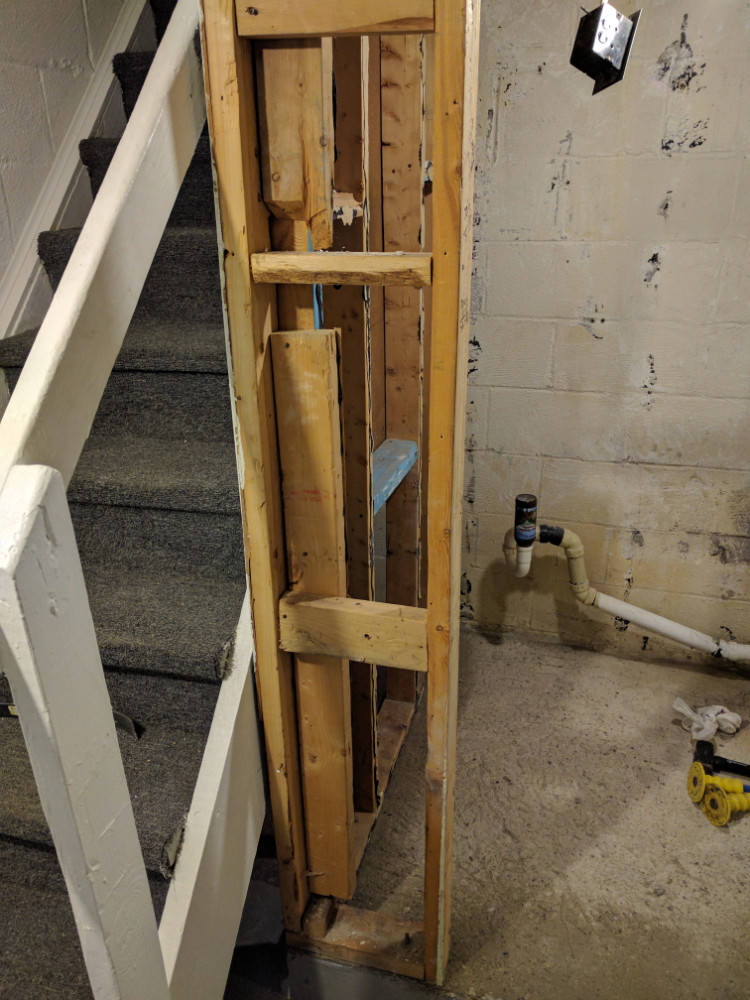
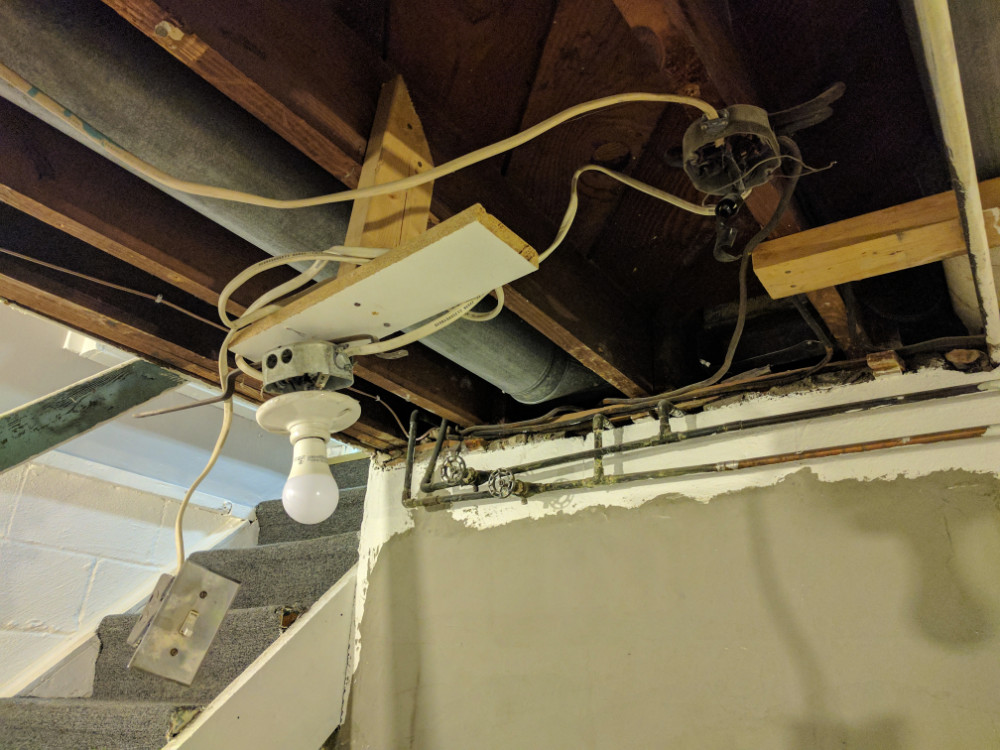
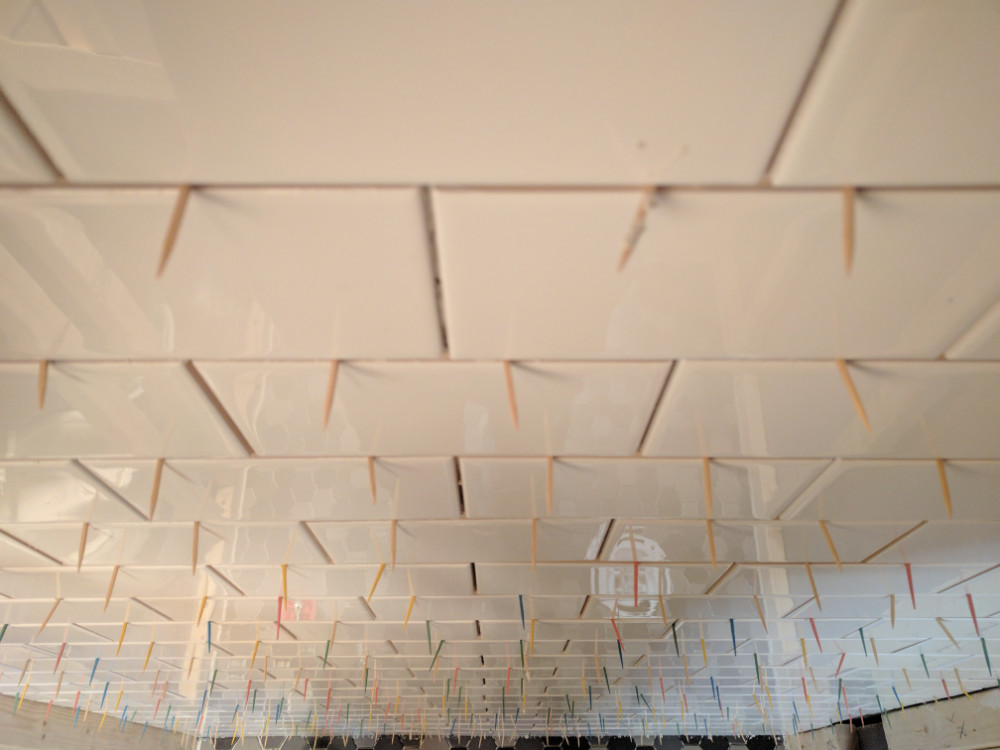
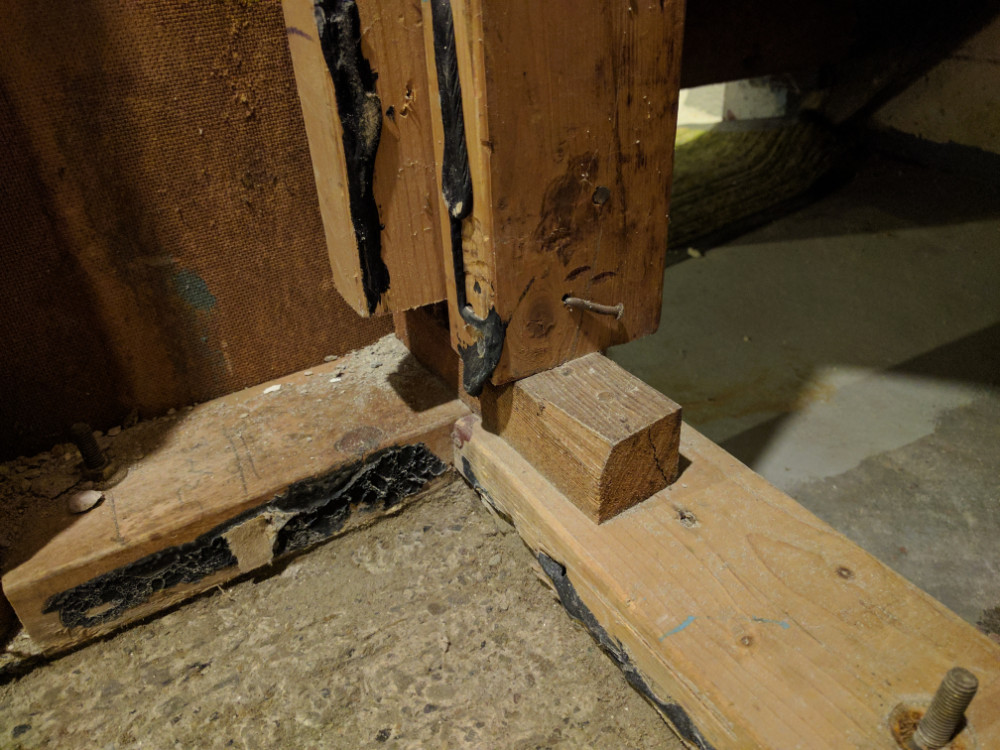 As demolition of the bathroom continued I found terrifyingly bad electrical that I removed completely and replaced with a dedicated code compliant circuit. I also located some of my favorite framing techniques (visible in the photo to the right) buried in the walls. There are a slew of additional photos in the gallery below, but this one was the most “artistic” of the framing shots.
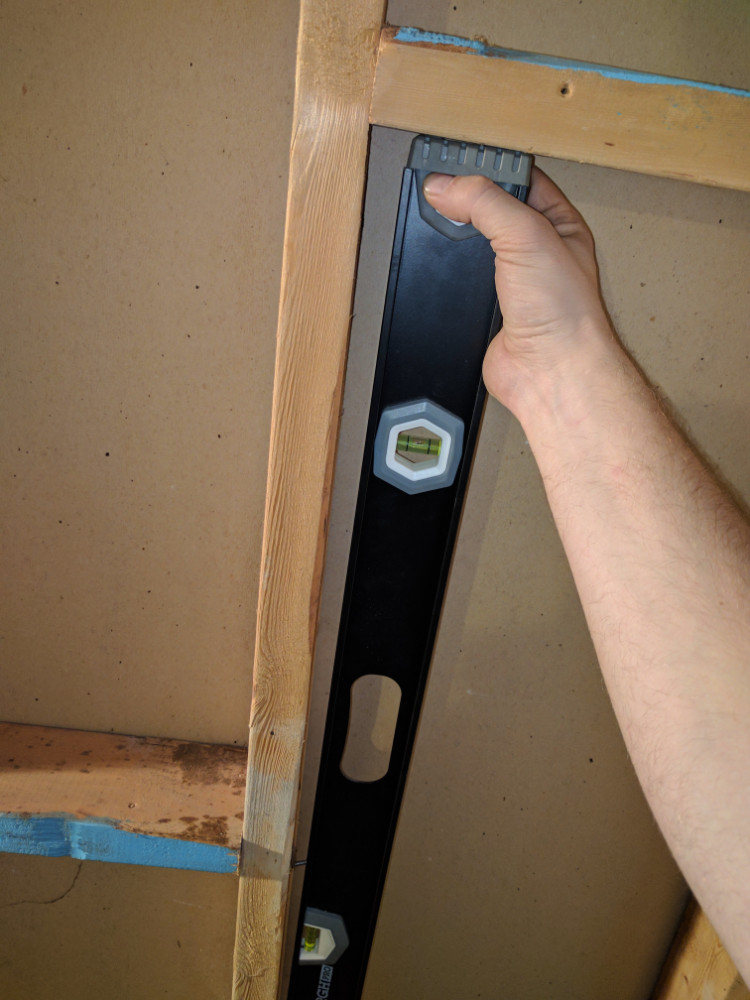
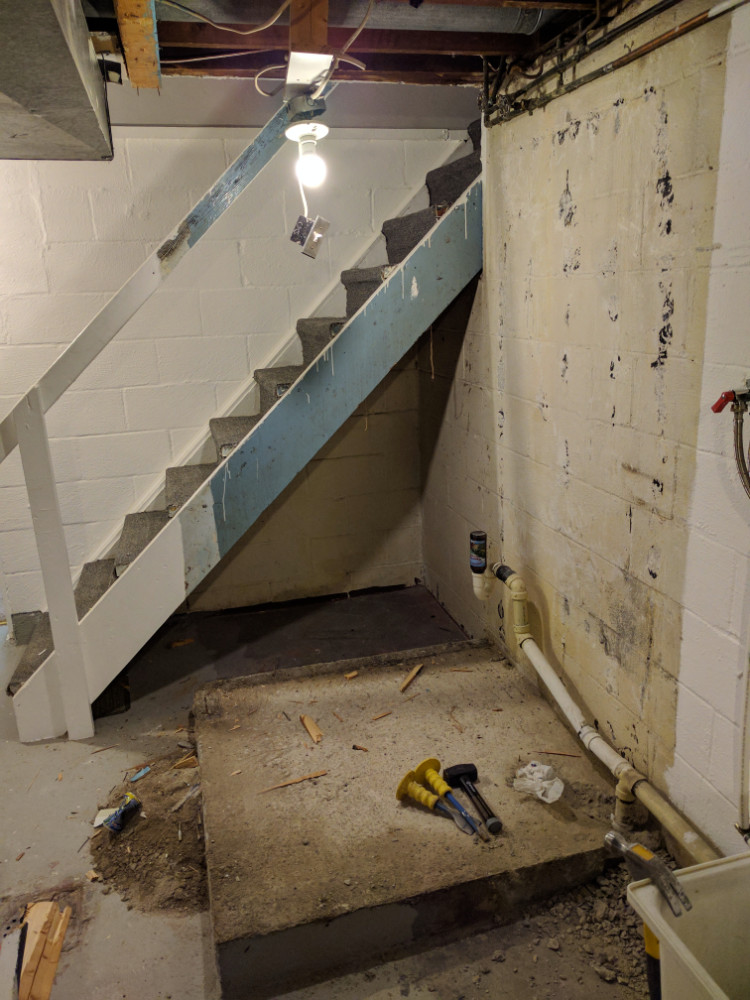
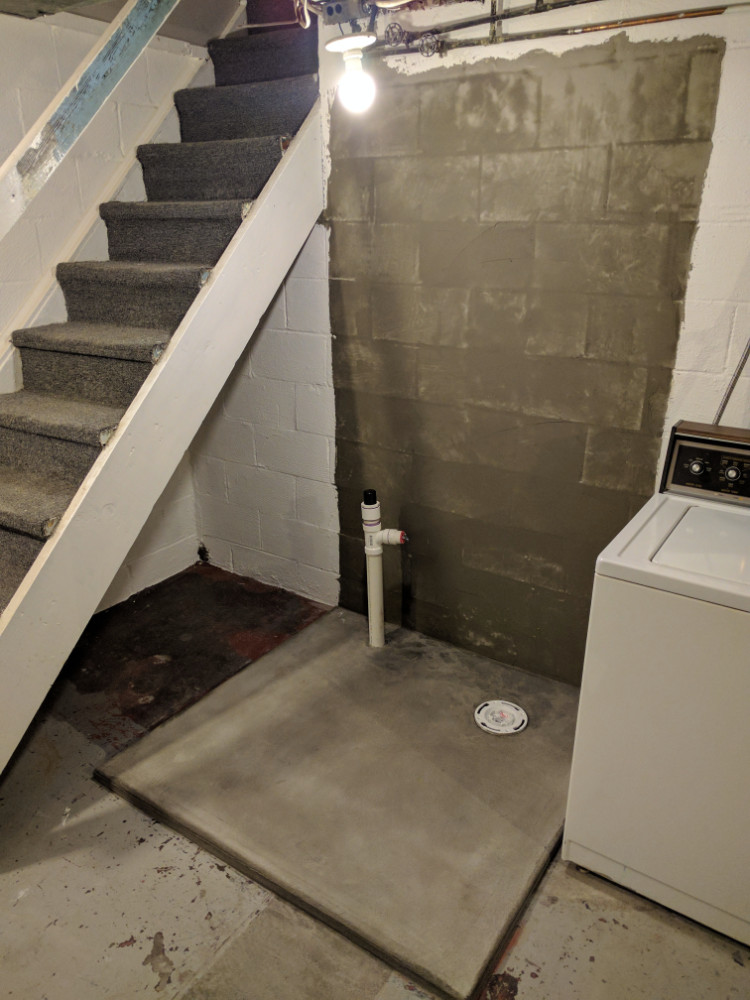
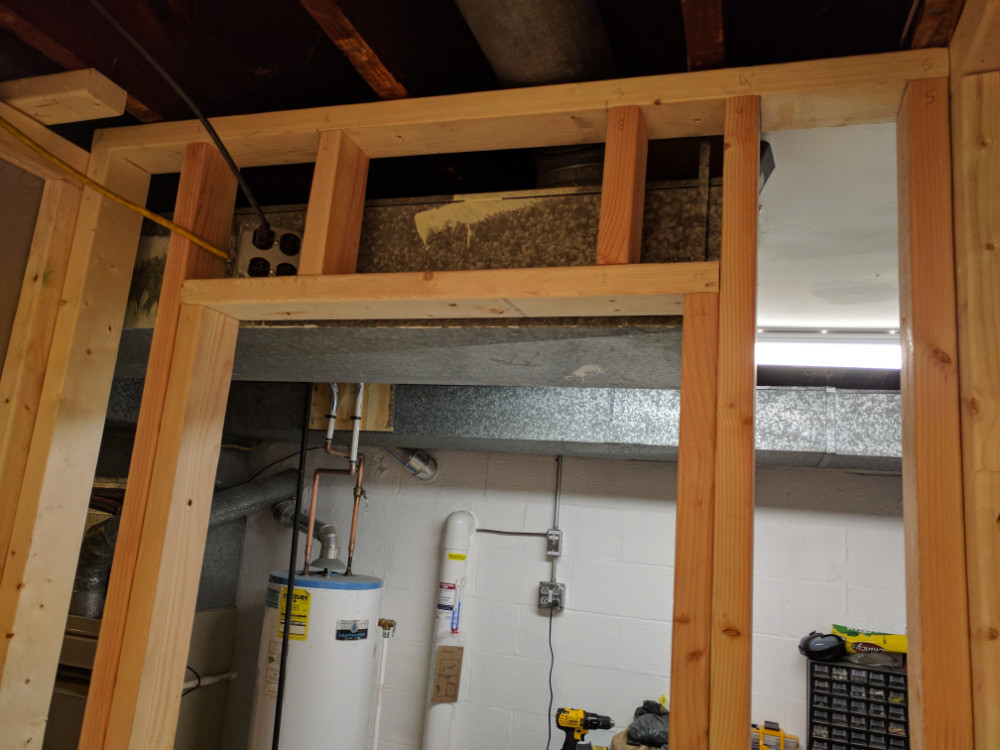
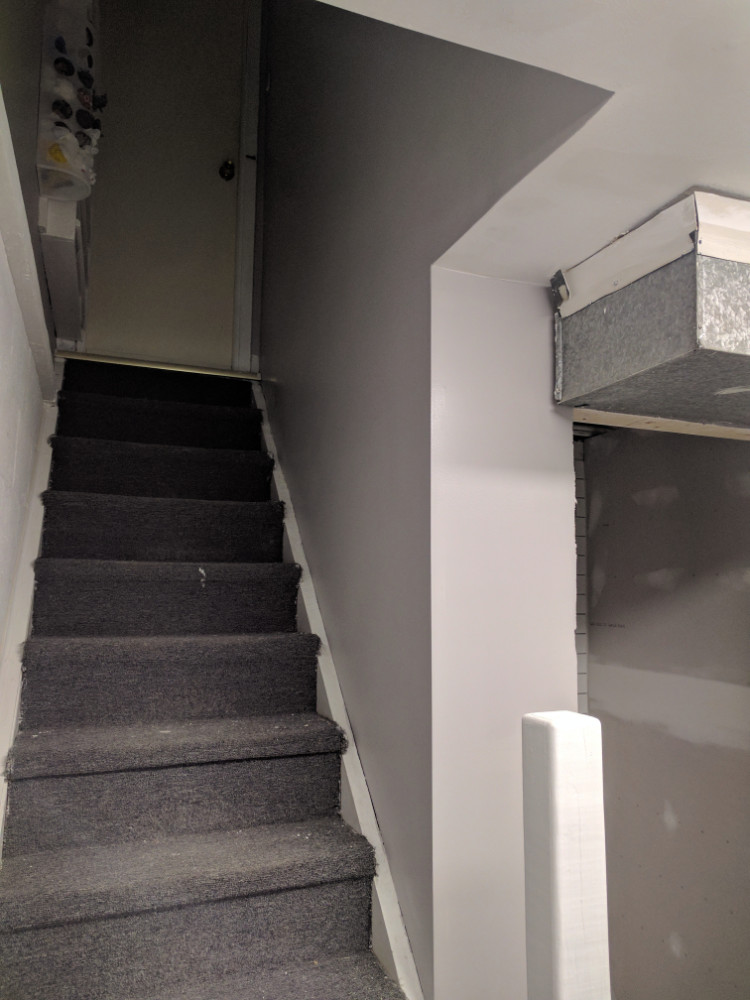
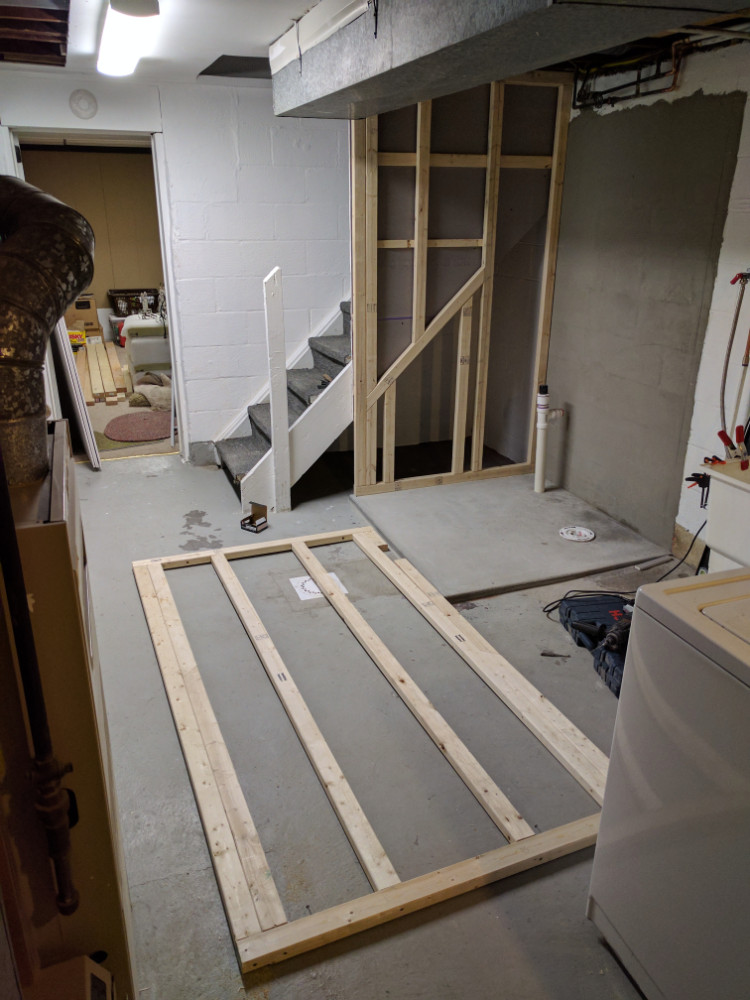 As a part of the plumbing replacement I removed the old stoop. I did install a new one that was just thick enough to level the floor completely, but not high enough to take away from the new ceiling height I was aiming for. This allowed me to frame and install all of the fixtures with ease. The bathroom was re-framed in a way that made sense (good support, 16-inch centers, and plumb), but it also lined up with the stairwell so I could finish a contiguous, clean look instead of the strange offset that was there before. You can see this in the previous stairwell cleanup post.
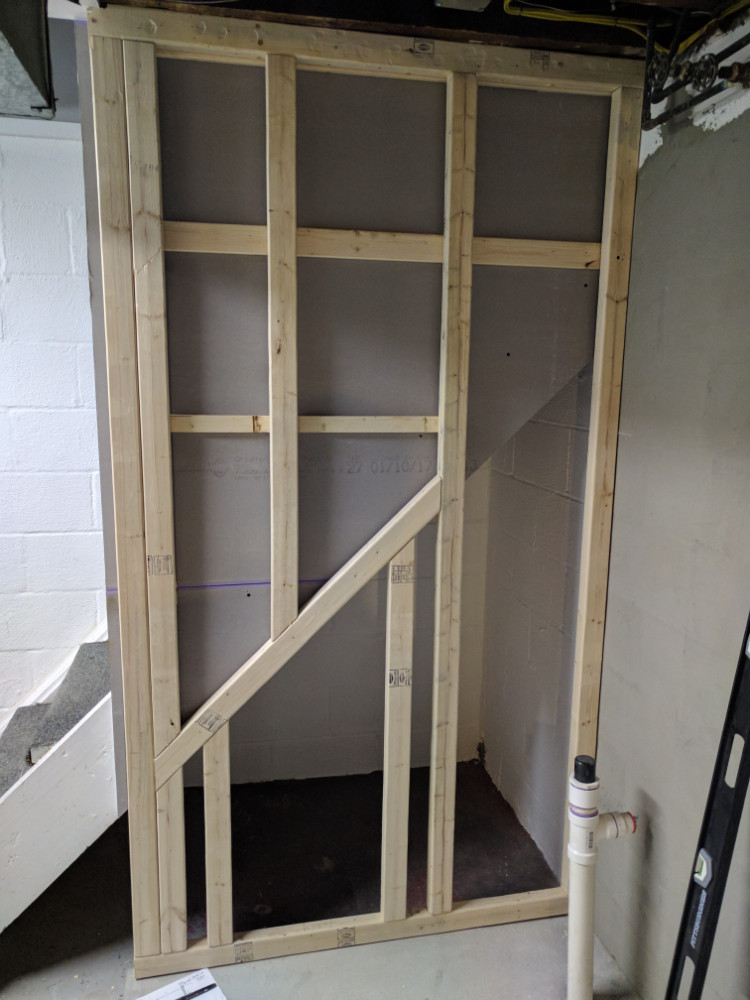
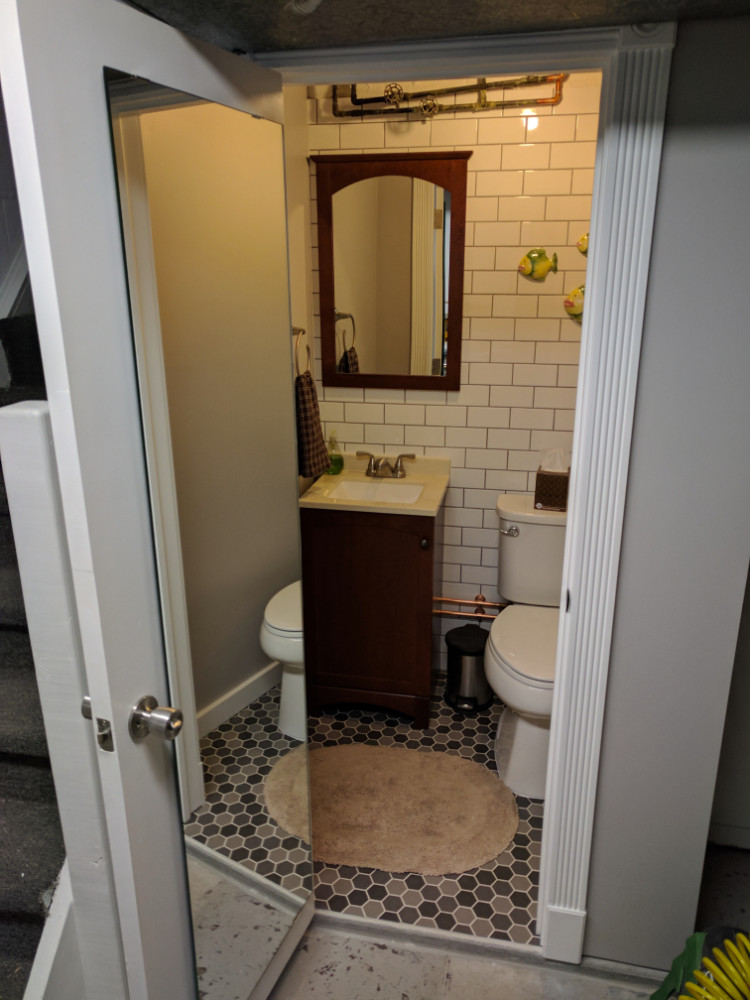
To maximize the usable space in the bathroom, I was able to extend the width of the room by two inches when the slab was poured. By framing the side walls with 2×3 laid on their side I was able to gain an additional four inches of space. The front face was framed traditionally using 2x4s. Following the completion of the framing, I finalized the installation of the electrical and installed the drywall. The drywall I used was 1/2-inch mold/mildew/moisture resistant drywall, and the inside walls used 3/8-inch drywall. This helped eek every last inch of space out of the room I could possibly design around. All in all, I was able to extend the width of the room by 6.25″, giving enough space that the toilet bowl doesn’t touch the wall and a garbage can could fit next to the sink.
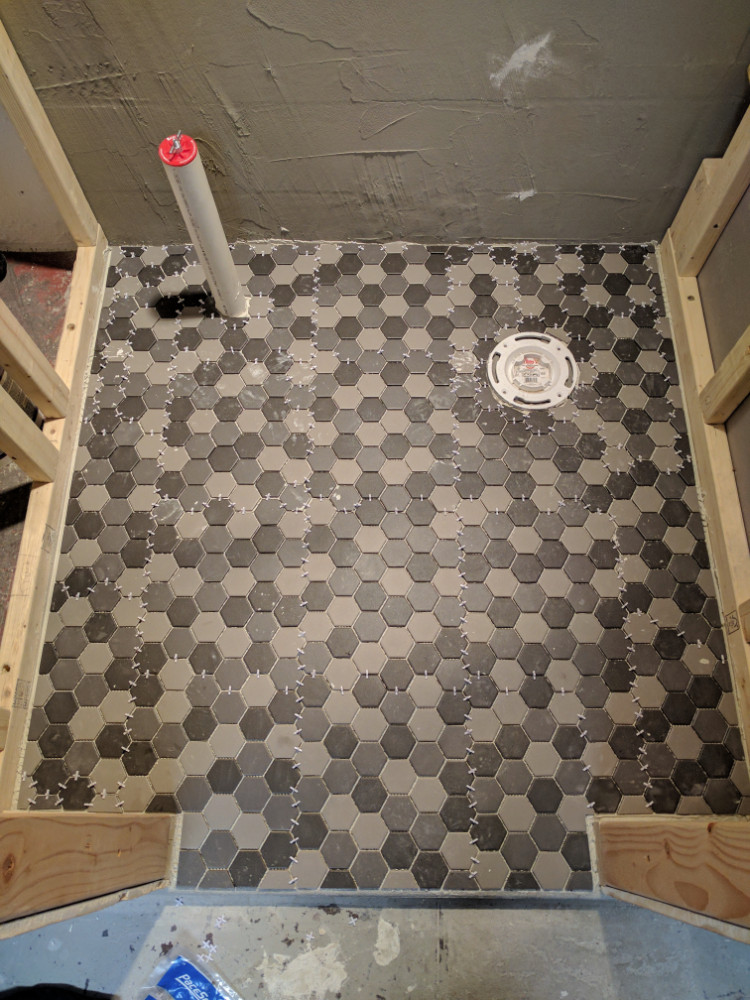
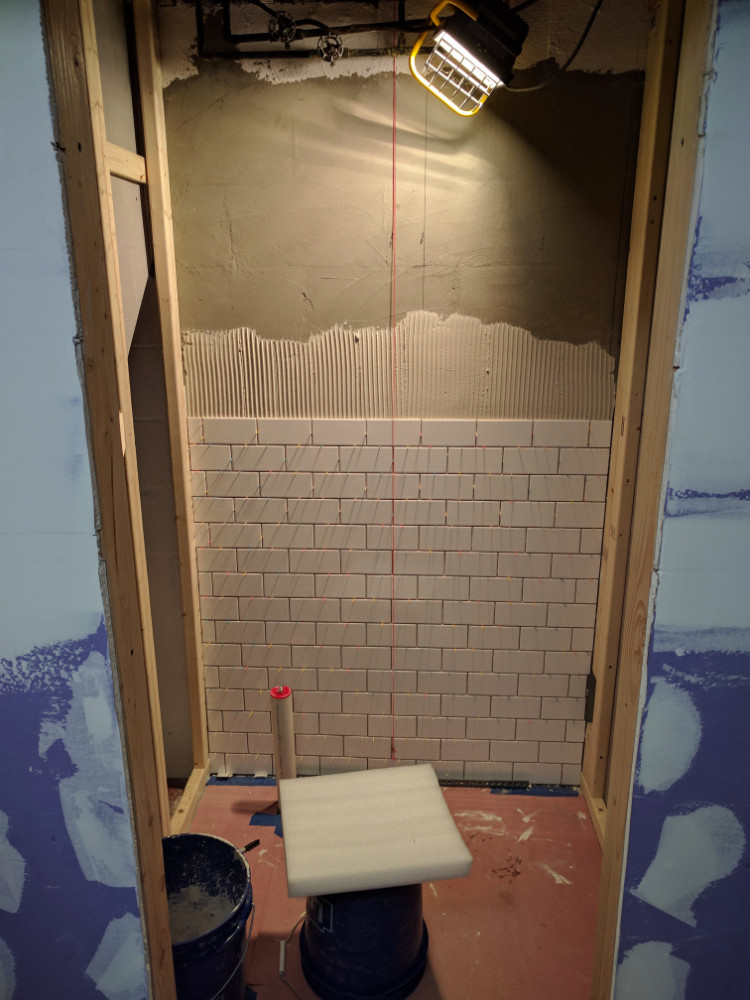
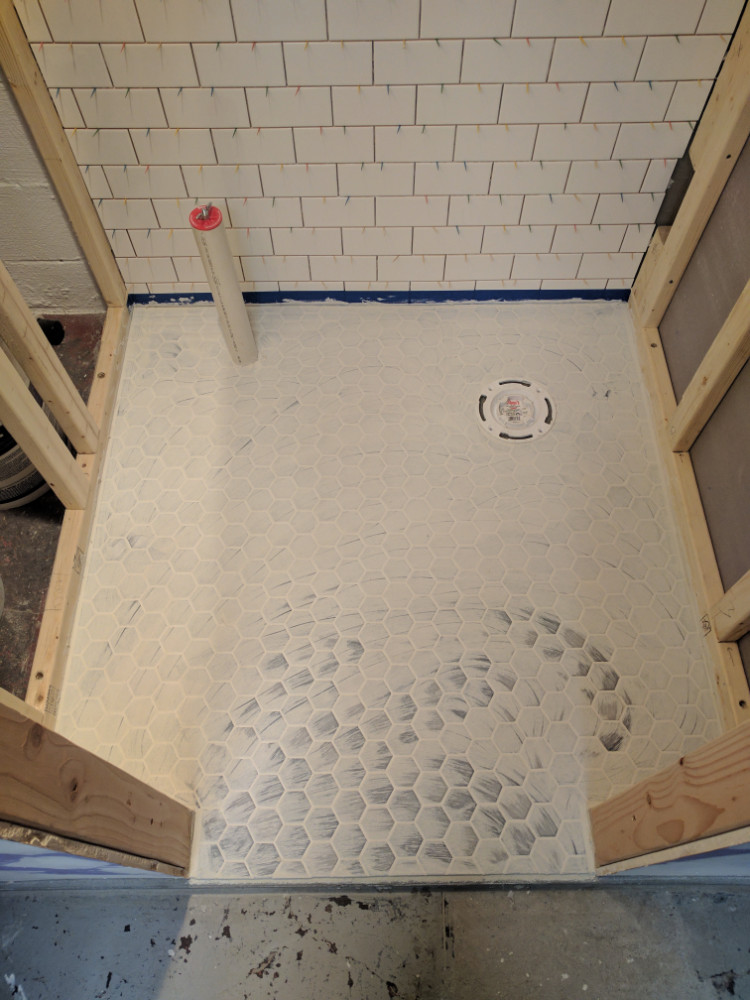
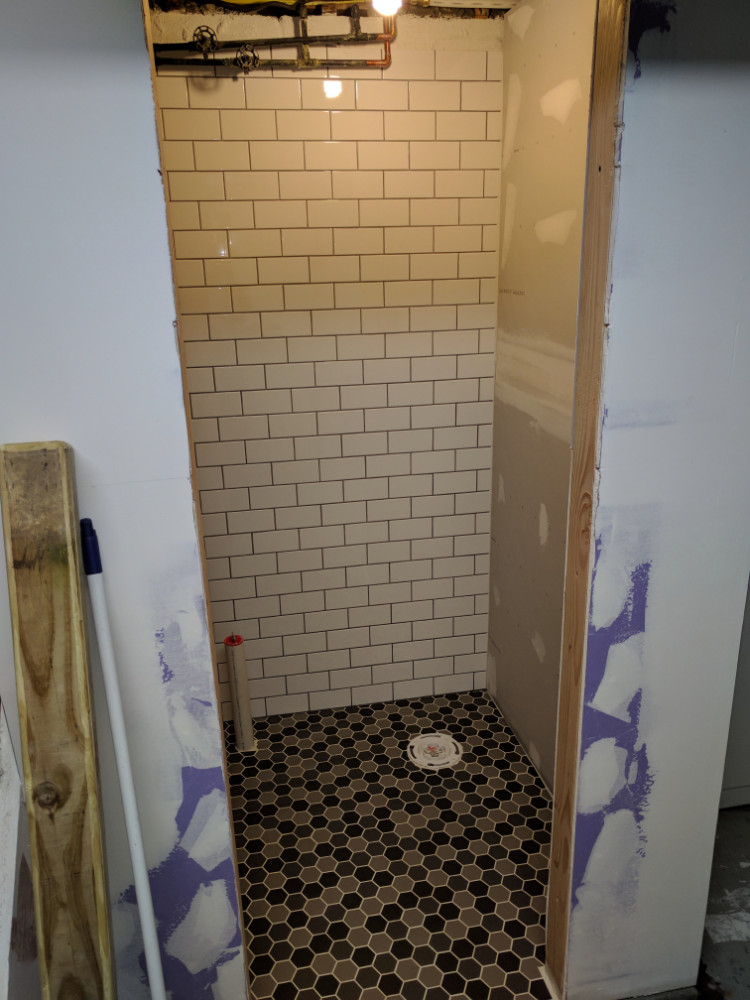
 When picking the surface materials, I fell in love with the floor tile the moment I saw it at the store. I decided to go with opposing contrast when I drew-up the plans. The floor would be a grey tile with a pure white grout, while the back wall would use a grey grout (same color as the lightest piece of floor tile) and bright white subway tile to match the floor grout. I would not recommend anyone with the slightest sense of self-preservation do the type of tiling that I did. This was one of the most tedious jobs I have ever completed. In part, this was caused by the water-based glue used to hold the backing cloth to the tile sheets. When cutting it on the tile saw things got wet… then the sheets fell apart requiring mosaic work like none other. To top this off, the cheap subway tile wasn’t perfectly square, requiring a lot of time and finesse to keep the lines clean. Overall, I think this turned out fantastic. My biggest fear during this process came about when I was standing precariously on a step stool up against the “cactus wall” to set the last few rows of wall tile. One slip would have been extraordinarily painful, but thankfully I didn’t have to discover this firsthand. I have shared this horror in the photo to the right.
Once the tile and grout installs were complete I went back and painted the bathroom walls; As you can probably guess… (sensing a theme?) they are grey –the same color as the rest of the interior. At first, I was afraid it would be too dark, but the white back wall brought more than enough brightness to the room.
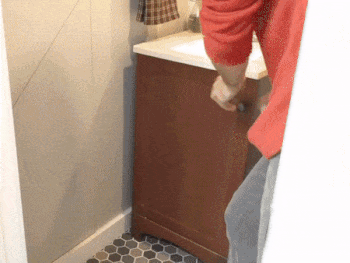
 Due to a technical issue with the location of the house footer I was unable to bury the water lines, requiring them to be surface mounted. For a modern look I decided to polish the copper water lines and surface mount them using copper plated bell mounts. I decided that although PEX comes in white, it would look cheap having this visible, thus my decision to use the more “traditional” copper. Surprisingly this turned out better than expected, and is actually quite beautiful, if I may say so myself. The toilet installation went off without a hitch, and the vanity got fitted for the plumbing and went equally as well. Due to the low height of the water lines under the sink, I had to make my own compression lines to plumb it in. This is much cheaper but takes significantly more effort than traditional flex line connections; 24-inch lines would have worked well, but the expense was far greater and wouldn’t have been nearly as neat. To ensure no further venting problems plagued the bathroom or laundry basin, AAVs (air admittance valves) were plumbed in under each sink and the trap heights were measured appropriately to prevent auto-siphoning. I have not had one issue since this project wrapped up.
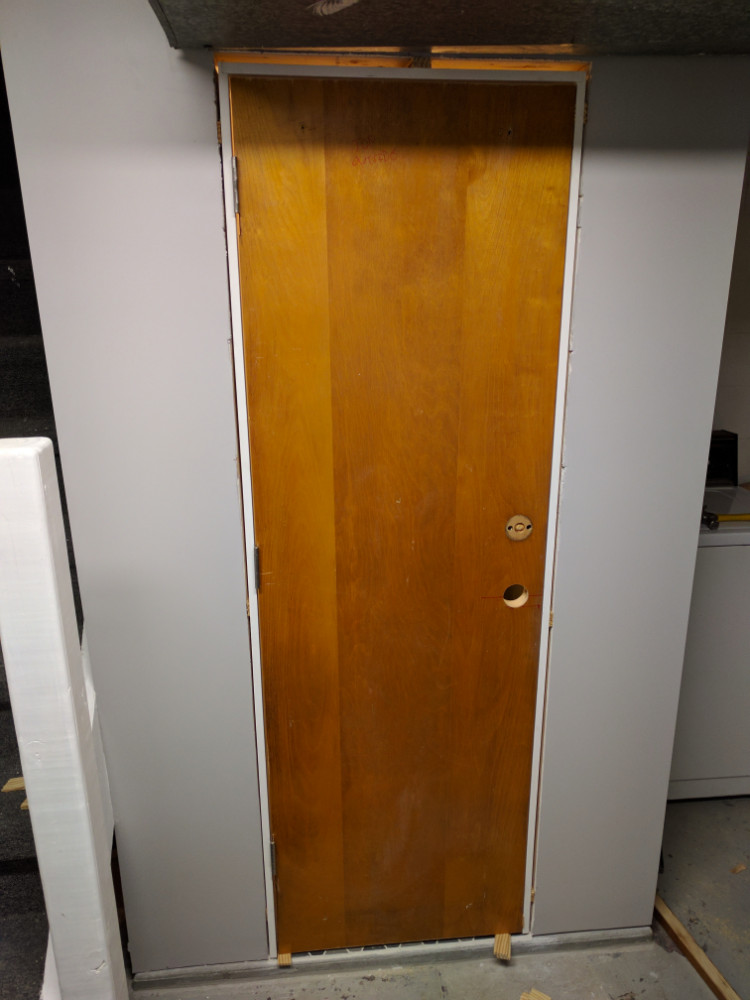
 The bathroom door is actually the old closet door from the master bedroom. I drilled for a new lock-set, trimmed the door to the new size, and painted it before installing new hardware and hanging it on a new frame. Any holes that were in the door from the old hardware got plugged with the wood cut out for the new hardware and a bit of Bondo to clean up any rough spots. Everything fits perfectly (measure twice, cut once!) and looks great now. I also cleaned up the mirror from the master bedroom door and mounted it in the bathroom to make it feel more spacious.
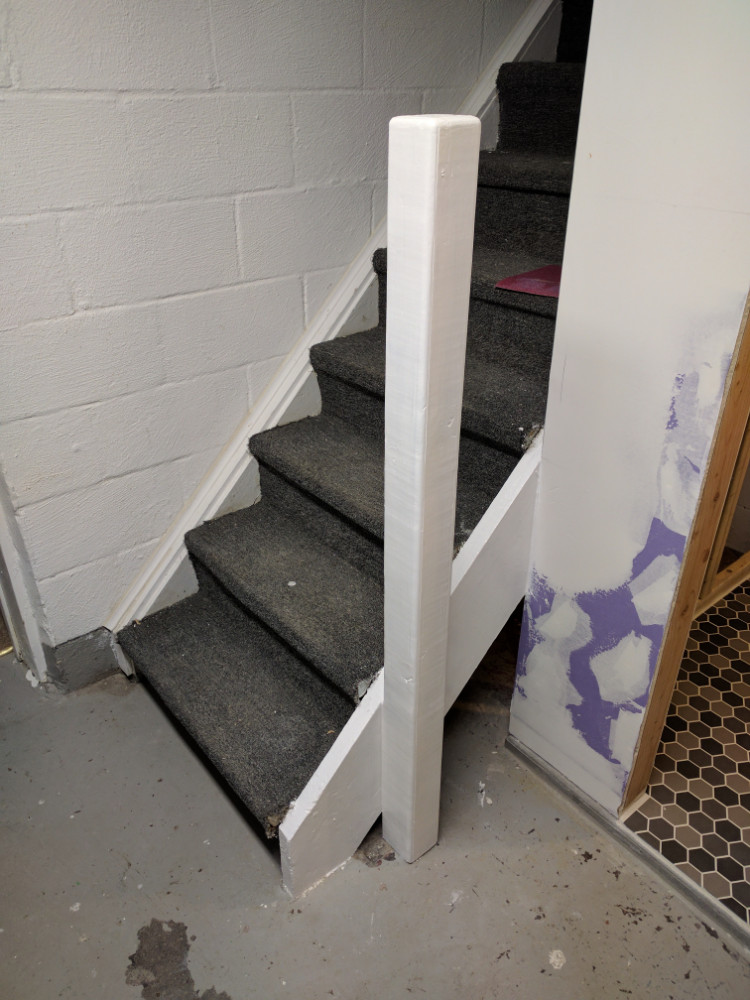
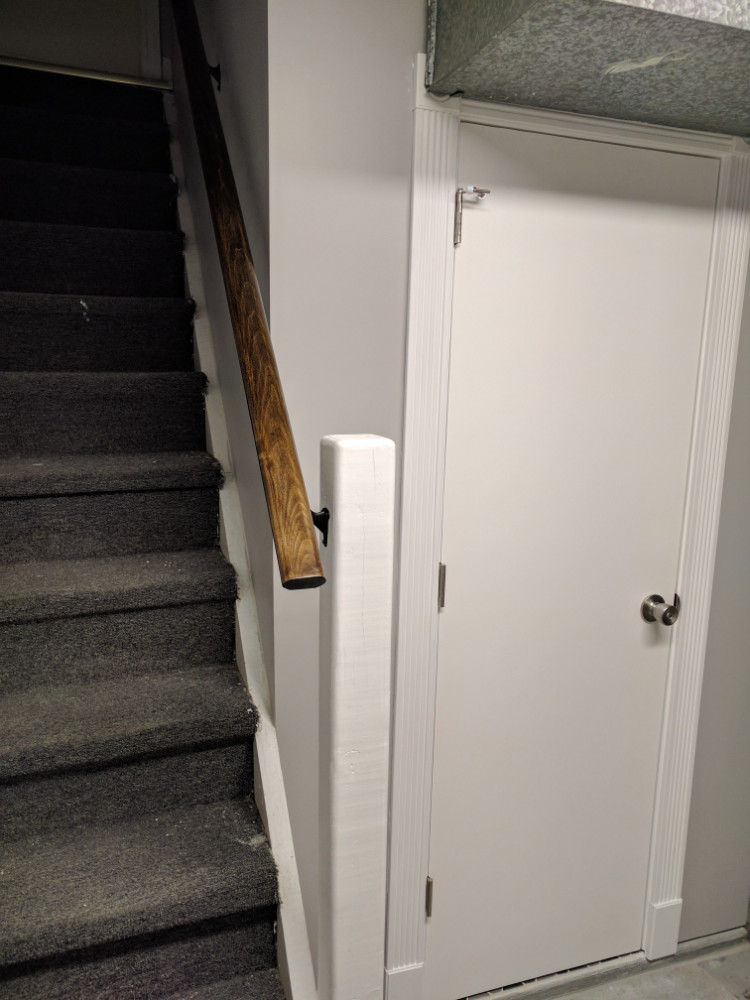
With the molding installed, I ran a new poplar railing to replace the old metal closet hanging rod and 2×4; it not only looks great, but is actually functional! I stained it the same color I want on the rest of the floors in the house as a test, and verified that is the color I want. The railing post is a recycled 4×4 post that I routed the corners and painted. It looks great, especially since I didn’t want anything fancy in the basement and it did the job. After adding a few lag bolts into the equation, the stair stringer will give way far before the railing and post do.
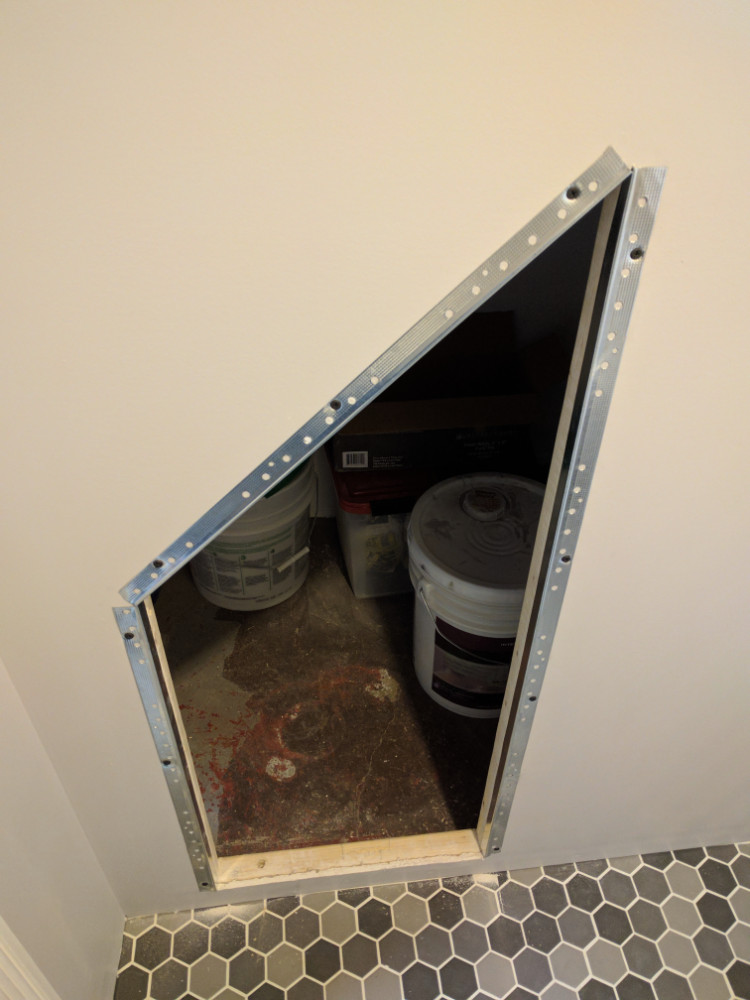
 Finally, the best part (in my opinion) of this bathroom is my semi-hidden stair storage access door. The old access was a cabinet door screwed to the wall with drywall screws. The new one is made of 3/8-inch plywood, cut one blade width smaller than the opening. The opening was finished with single-sided metal plaster edging and painted for a seamless look. I put stops in at the top and bottom, and used two hidden magnetic child safety latches for the locking mechanism. The door stays locked in place until you set two large neodymium magnets over the dimples in the plywood. Following that, you simply push in on the magnets until the door clicks, then it will fall out of place. To reinstall the door, slide it back inside the pocket, and (without the magnets in place) push in on the dimples until the door clicks again. It is a very simple mechanism, but I have never seen it used before so I claim it as my own brain child!
As usual, be sure to check out the gallery below, there were too many images to throw in the post! Keep checking back for more projects, and definitely take a look at the plumbing replacement post for the “messy” part of this project.